A Plastic Free You & Me: Sustainable Kitchen & On the Go

Welcome to the last installment of my plastic-free, sustainable living series! This post’s focus is on kitchen and “on the go” items. We naturally consume a lot of plastic when we’re on the move and in the kitchen because it’s convenient. It doesn’t have to be that way, though! There are plenty of options out there that will help you consume less and still maintain a level of convenience. 

On the Go

Reusable water bottles and reusable grocery bags are the easy ones here. I’m confident to say that we all probably have a bunch of these lying around. I usually keep some reusable grocery bags in the trunk of my car so if I forget to bring them with me, they’re right there. I also keep a water bottle at my desk to bring if I go out to lunch so I don’t need to use a cup. 

At some point in your life, you’ve probably received a reusable water bottle with a random company logo on it. I’ve taken to getting some cool stickers (like when I visit a national park!) and using them to cover up the logo.

Taking reusable grocery bags a step further, I was gifted a set of reusable produce bags. These have been really useful at the grocery store when purchasing small piece produce – think brussels sprouts or green beans. In general though, I typically use a bag for produce very rarely. In my opinion, you don’t really need it for larger items like tomatoes, potatoes, even if you’re getting a few. I don’t even use one if I’m only getting like one jalapeno. But if you’re buying small things like brussels sprouts, you do need a bag. These are really useful and I have them live in my grocery bags so if I don’t remember to actively bring it, chances are there’s one in one of the bags I’ve brought. I also keep a few in our cabinet to use for storing produce at home like potatoes or a half head of cauliflower.

I also carry a set of bamboo reusable utensils I bought off Etsy to keep in my backpack that I bring to and from work. It’s been really great to use when I need a utensil and the only ones available are plastic. It came with a handy holder, so I usually just wipe whatever utensil I used off with a napkin and wash it when I get back to my office. It’s also been great for using at the airport and traveling! 

Kitchen

I think in general I typically do a good job keeping my kitchen plastic free. I rarely use cling wrap, and we have a variety of different tupperwares that we use to store food. The things I find myself using most in the kitchen are aluminum foil, plastic bags, and paper towels/napkins. 

I reuse plastic bags as much as possible and invest in compostable ones for items I know I won’t want to wash (like meat). Depending on your location, you can likely find compostable sandwiches and snack bags at your grocery store. They’re a bit more expensive, but my suggestion is to only use them for things where you know you’re going to throw the bag away. I’d really like to try Stasher bags eventually, so stay tuned on those. 

Food Wraps

Etee is a great site that has a bunch of plastic free items for your home. I’ve purchased their vegan food wraps twice and they work really great. With moderate use, my first set lasted for over a year. They work well for covering bowls that don’t have a top, covers for the ends of produce (like half of a cucumber), and transport for things like hard boiled eggs (vs using a baggie). The best part is that when they’ve reached the end of their life, they’re compostable!

A tip: Use a milder dish detergent and cold water to wash and they’ll last longer. 

Reusable Napkins

I was gifted these and I really love them. They’re definitely worth the investment and we use them fairly often. I usually use one for a day or two and then will wash it when I’m ready to do a load of towels. In the in-between time, we usually use the napkins we’ve received from takeout if we have them.  

Reusable Paper Towels

There are a lot of options out there for reusable paper towels! One option is Swedish dish towels. I was also gifted these (yes, same time as the reusable napkins!). They work surprisingly well, but do get a little gross-looking after a while (so I’ve spared you the picture). I haven’t quite figured out what their lifespan is yet, but despite their looks, they seem to still be working well after around nine months.

I was also gifted (can you sense a pattern here?! No complaints though – I love it!) a complete roll of reusable bamboo paper towels. In my first few uses, these have worked very well and wash easily. They feel like regular paper towels, but much stronger!

All of these reusable napkins and towels have come in handy during COVID since there have been multiple bouts of paper towel shortages. I’ve been able to go a while without needing to buy paper towels, saving money and the environment! I have a bag hanging in my laundry room that I throw reusable items into and when it’s fairly full, I’ll do a load to wash them. 

In Conclusion…

I’m only one person, but I believe strongly that if we all make small changes in our behavior it will make a difference. I hope these posts were helpful and provided you with some ideas to invest in plastic and waste-free options for your own home! I have some other products I’d like to try – like eco-friendly hair ties and the Stasher bags. It’s just a matter of making the investment and also depleting my current stock of what I have on hand before buying the new, eco-friendly version! Thanks for reading and stay tuned for more!

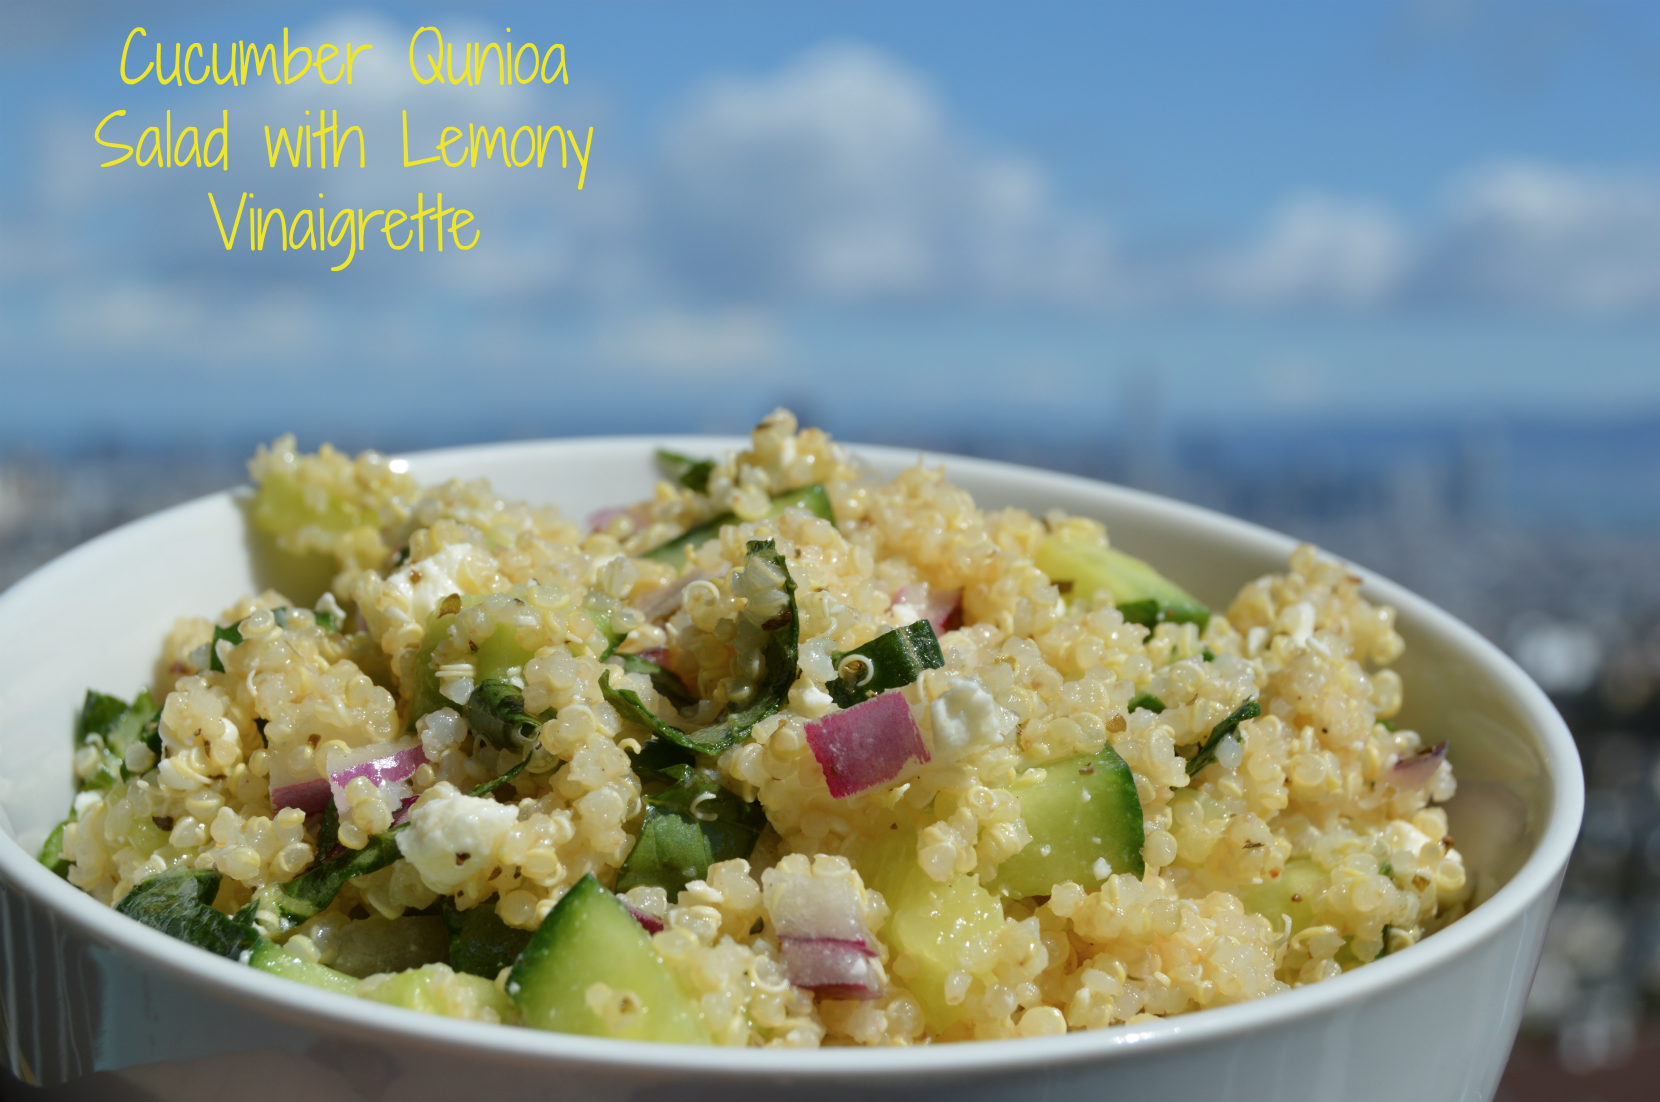
Cucumber Quinoa Salad with Lemony Vinaigrette

I’m not quite sure how I came across this recipe.  I want to say it’s because we had a cucumber in our produce box, but with the service we use (Imperfect Produce – link to site and also I have written about them in the past) we get to pick what’s in there.  I don’t really make a lot of stuff with cucumber, so I’m hesitant to think I’d pick a cucumber.  I think it could have also been that we had some old quinoa lying around and I don’t cook very often with quinoa so I needed some recipe inspiration.  That’s where this Cucumber Quinoa Salad from Gimme Some Oven comes in!

This salad is super easy to make and also very filling and tasty.  It makes a great lunch, side dish, or even dinner on a hot summer day.  I follow the instructions very closely to the original, but I have noticed that it can take about 50% more quinoa and still be tasty.  So if you want to spread out the salad a bit with more quinoa, that works great.  I sometimes use 3 cups cooked quinoa instead of the recommended 2 cups.

Screen Shot 2018-03-25 at 1.33.37 PM

DSC_0984

ps qunioa salad1

Salad Ingredients:
1 cucumber, diced
2 cups cooked and chilled quinoa
1/2 cup red onion, diced
1/2 cup crumbled feta cheese
1/3 roughly chopped basil leaves
1 batch lemony vinaigrette (see below)

Lemony Vinaigrette Ingredients:
1/4 cup extra virgin oil
2-3 tablespoons apple cider vinegar
1 tablespoon fresh lemon juice
1 teaspoon dried Italian seasoning blend
Pinch of salt and pepper

Instructions:
Combine all salad ingredients into a large bowl and mix.  Combine all Lemony Vinaigrette ingredients into a smaller bowl and whisk together.  Pour Lemony Vinaigrette mixture onto salad and mix one last time.

DSC_0982

“Pulled Pork” AKA BBQ Sweet Potato Sammies with All of the Slaws!

This sandwich, as the post title states, is a vegetarian take on pulled pork.  Personally, I find it just as delicious and it’s super easy to make.  It makes a great lunch because you can simply make it the night before and you’ll have plenty to bring for a few days of lunches.  Plus, it’s great because it goes great with a variety of different slaws, which I’ll include below too.

BBQ Sweet Potato Sammies

Ingredients:
2 large sweet potatoes
BBQ sauce of your choosing (4-5 tbsp is good – feel free to add more/less. I like more.)
Olive Oil cooking spray
Buns (for sandwich)
Some kind of slaw (directions below)

Directions:

  1. Wash and skin sweet potatoes.  I usually just like to cut off the top/bottom of the potatoes and remove any weird spots from the skin.
  2. Shred potatoes.  You can either use a cheese grater for this, or you can use a spiralizer machine.  The spiralizer machine will cut your potatoes into curls, but I usually just take the curls and chop them up a little.  This is the easiest way, but the cheese grater method makes it a little more like a pulled pork texture.  I’d say if you’re making this for a party, use the cheese grater.  If you’re making it for yourself, use the spiralizer.

    shredded-sweet-potato1

  3. Spray a large skillet with cooking spray.  Once it’s heated up, cook your potatoes for 10 minutes.  Stirring semi-constantly.
    sp-spirals-3
  4. After the 10 minutes, add your BBQ sauce and cook while stirring for another  5 minutes.
  5. You’re done!  Time to make the slaw.

For the slaw, I’m not the biggest fan of regular coleslaw (too much mayo), but I’m sure this will taste just fine with that.  I prefer vinegar based slaws, so here are a few I’ve made and I think taste really great with the BBQ sweet potatoes.

Clean Eating Mango Slaw

This slaw adds a nice sweet and salty flavor to your sammy.  I found this recipe on iFoodReal.

Ingredients:
1 lb white cabbage, shredded (thinly sliced is fine too)
1 large mango, diced
3 tbsp cilantro
1 tbsp white vinegar (or 2 if you’re like me and love vinegar)
1/2 tsp salt

Directions:  Combine all ingredients and toss in a large bowl!

Red Cabbage Slaw

This is a nice crunchy and colorful slaw to add to your BBQ sweet potatoes.  I found this recipe on Real Housemoms.

Ingredients:
1/2 red cabbage, thinly sliced
1/2 cup cilantro, chopped
2 medium carrots, shredded
1/3 cup rice vinegar
1/2 tbsp sugar
1/2 tbsp honey
1 tsp salt
1 tsp pepper

Directions: Toss ingredients together in a bowl and let sit for at least one hour.

Ginger Lime Asian Slaw

This slaw adds a nice sweet, but tangy flavor.  It’s a bit more involved than the first two, but it’s worth it.  I found this recipe on Real Food Real Deals.

slaw-2

Ingredients:
8 cups Napa cabbage, thinly sliced
3 carrots, grated
1 apple, grated
1/2 tsp salt
1 tbsp lime juice
2 tbsp olive oil
1 tbsp minced onion
1 tbsp minced fresh ginger
1 tbsp honey
2 tbsp rice vinegar

Directions:

    1. Combine cabbage, carrots, apple, salt, and lime juice into a large bowl.
    2. In a medium skillet, cook the onion, in 1 tbsp olive oil for about 5 minutes.  Add ginger and cook for another 30 seconds.
    3. In a bowl, mix together remaining tbsp of olive oil, honey, and rice vinegar.  Add the veggies from the pan.
    4. Pour the dressing over the cabbage mixture and mix.  Refrigerate for at least an hour before serving.

Imperfect Produce

Do you live in California? Do you live in the Bay Area?  Do you eat produce?  Awesome, keep reading.  BUT, even if you don’t live on those areas you should still keep reading to see if there is something similar in your area.  If you don’t eat produce, well, you can probably stop reading.

So what IS Imperfect Produce? Basically, they take produce that is not “pretty” enough for the grocery store and sell it to you!  The best part? They deliver.

Tons of produce is rejected from grocery stores just because it doesn’t look nice.  Perhaps the potatoes are a weird shape, there’s a scar on the zucchini, or the onion is too small.  These are all reasons perfectly good food will be rejected by the grocery store and then ultimately discarded!

With Imperfect, you can choose what size box you want as well as the contents of your box.  You can choose a mixed box, just fruit, or just veggies.  Each week you customize your box by choosing the type and quantity of produce you’d like to receive.  Then, you pay on the amount and type of produce you choose, plus a small shipping fee. In San Francisco, it’s $5 and they ship to you every Tuesday evening, so when you wake up Wednesday morning, you have produce!  It’s been a pretty great service so far.  The produce is great quality and the delivery is very reliable.  There is no monthly fee, and if you go away you can choose to skip a week or two.

We’ve been able to try out some new recipes that I normally wouldn’t have tried out because I wasn’t familiar with a recipe for the vegetable.  This has forced me to go out of my comfort zone and try some new things.  Fennel is now a favorite of mine!  Two recipes I was able to try out were this cabbage recipe and this cauliflower recipe.  The cabbage and cauliflower came from our Imperfect box.  So if you’re in the Bay Area, I’d definitely recommend Imperfect, and if you live outside of the Bay Area, I’d recommend searching for something similar near you.

IMG_2867

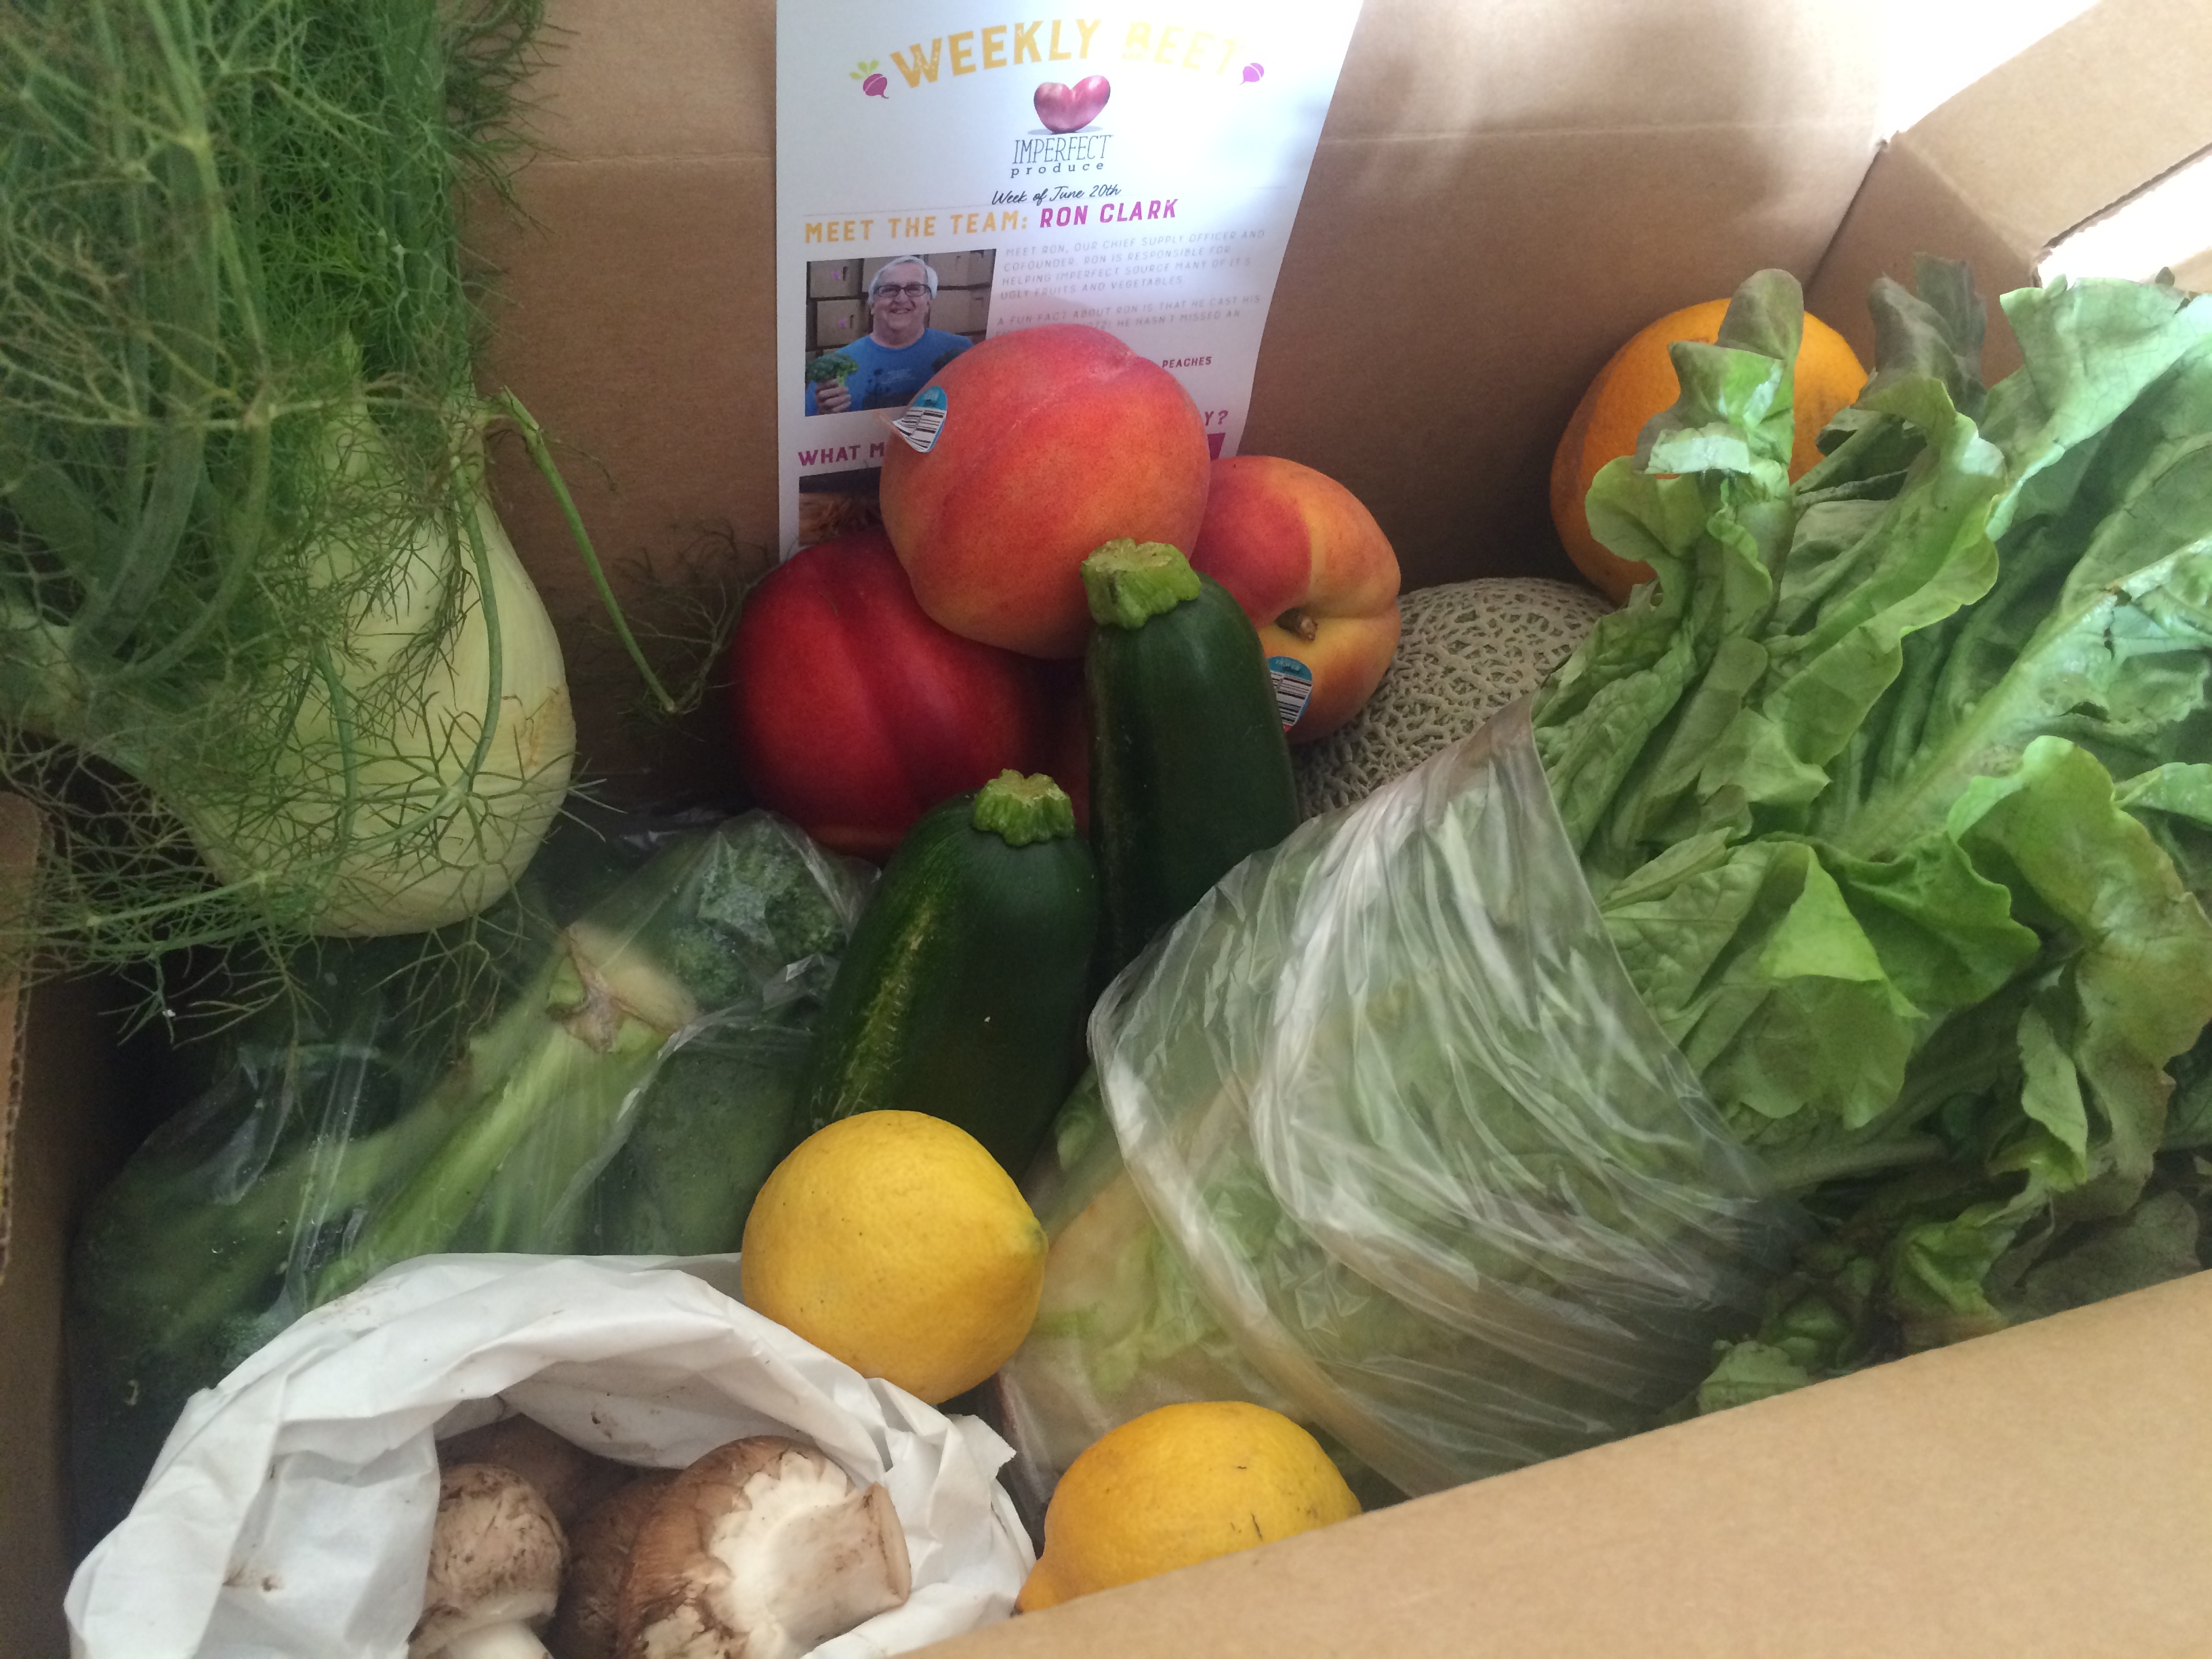
Our produce box! Each week it comes with some info about why the produce is ugly, the company, and a featured recipe.

IMG_2871

Fennel, Mushrooms, Broccoli, Lemons, Peaches, Nectarines, Zucchini, Lettuce, and Cantaloupe!


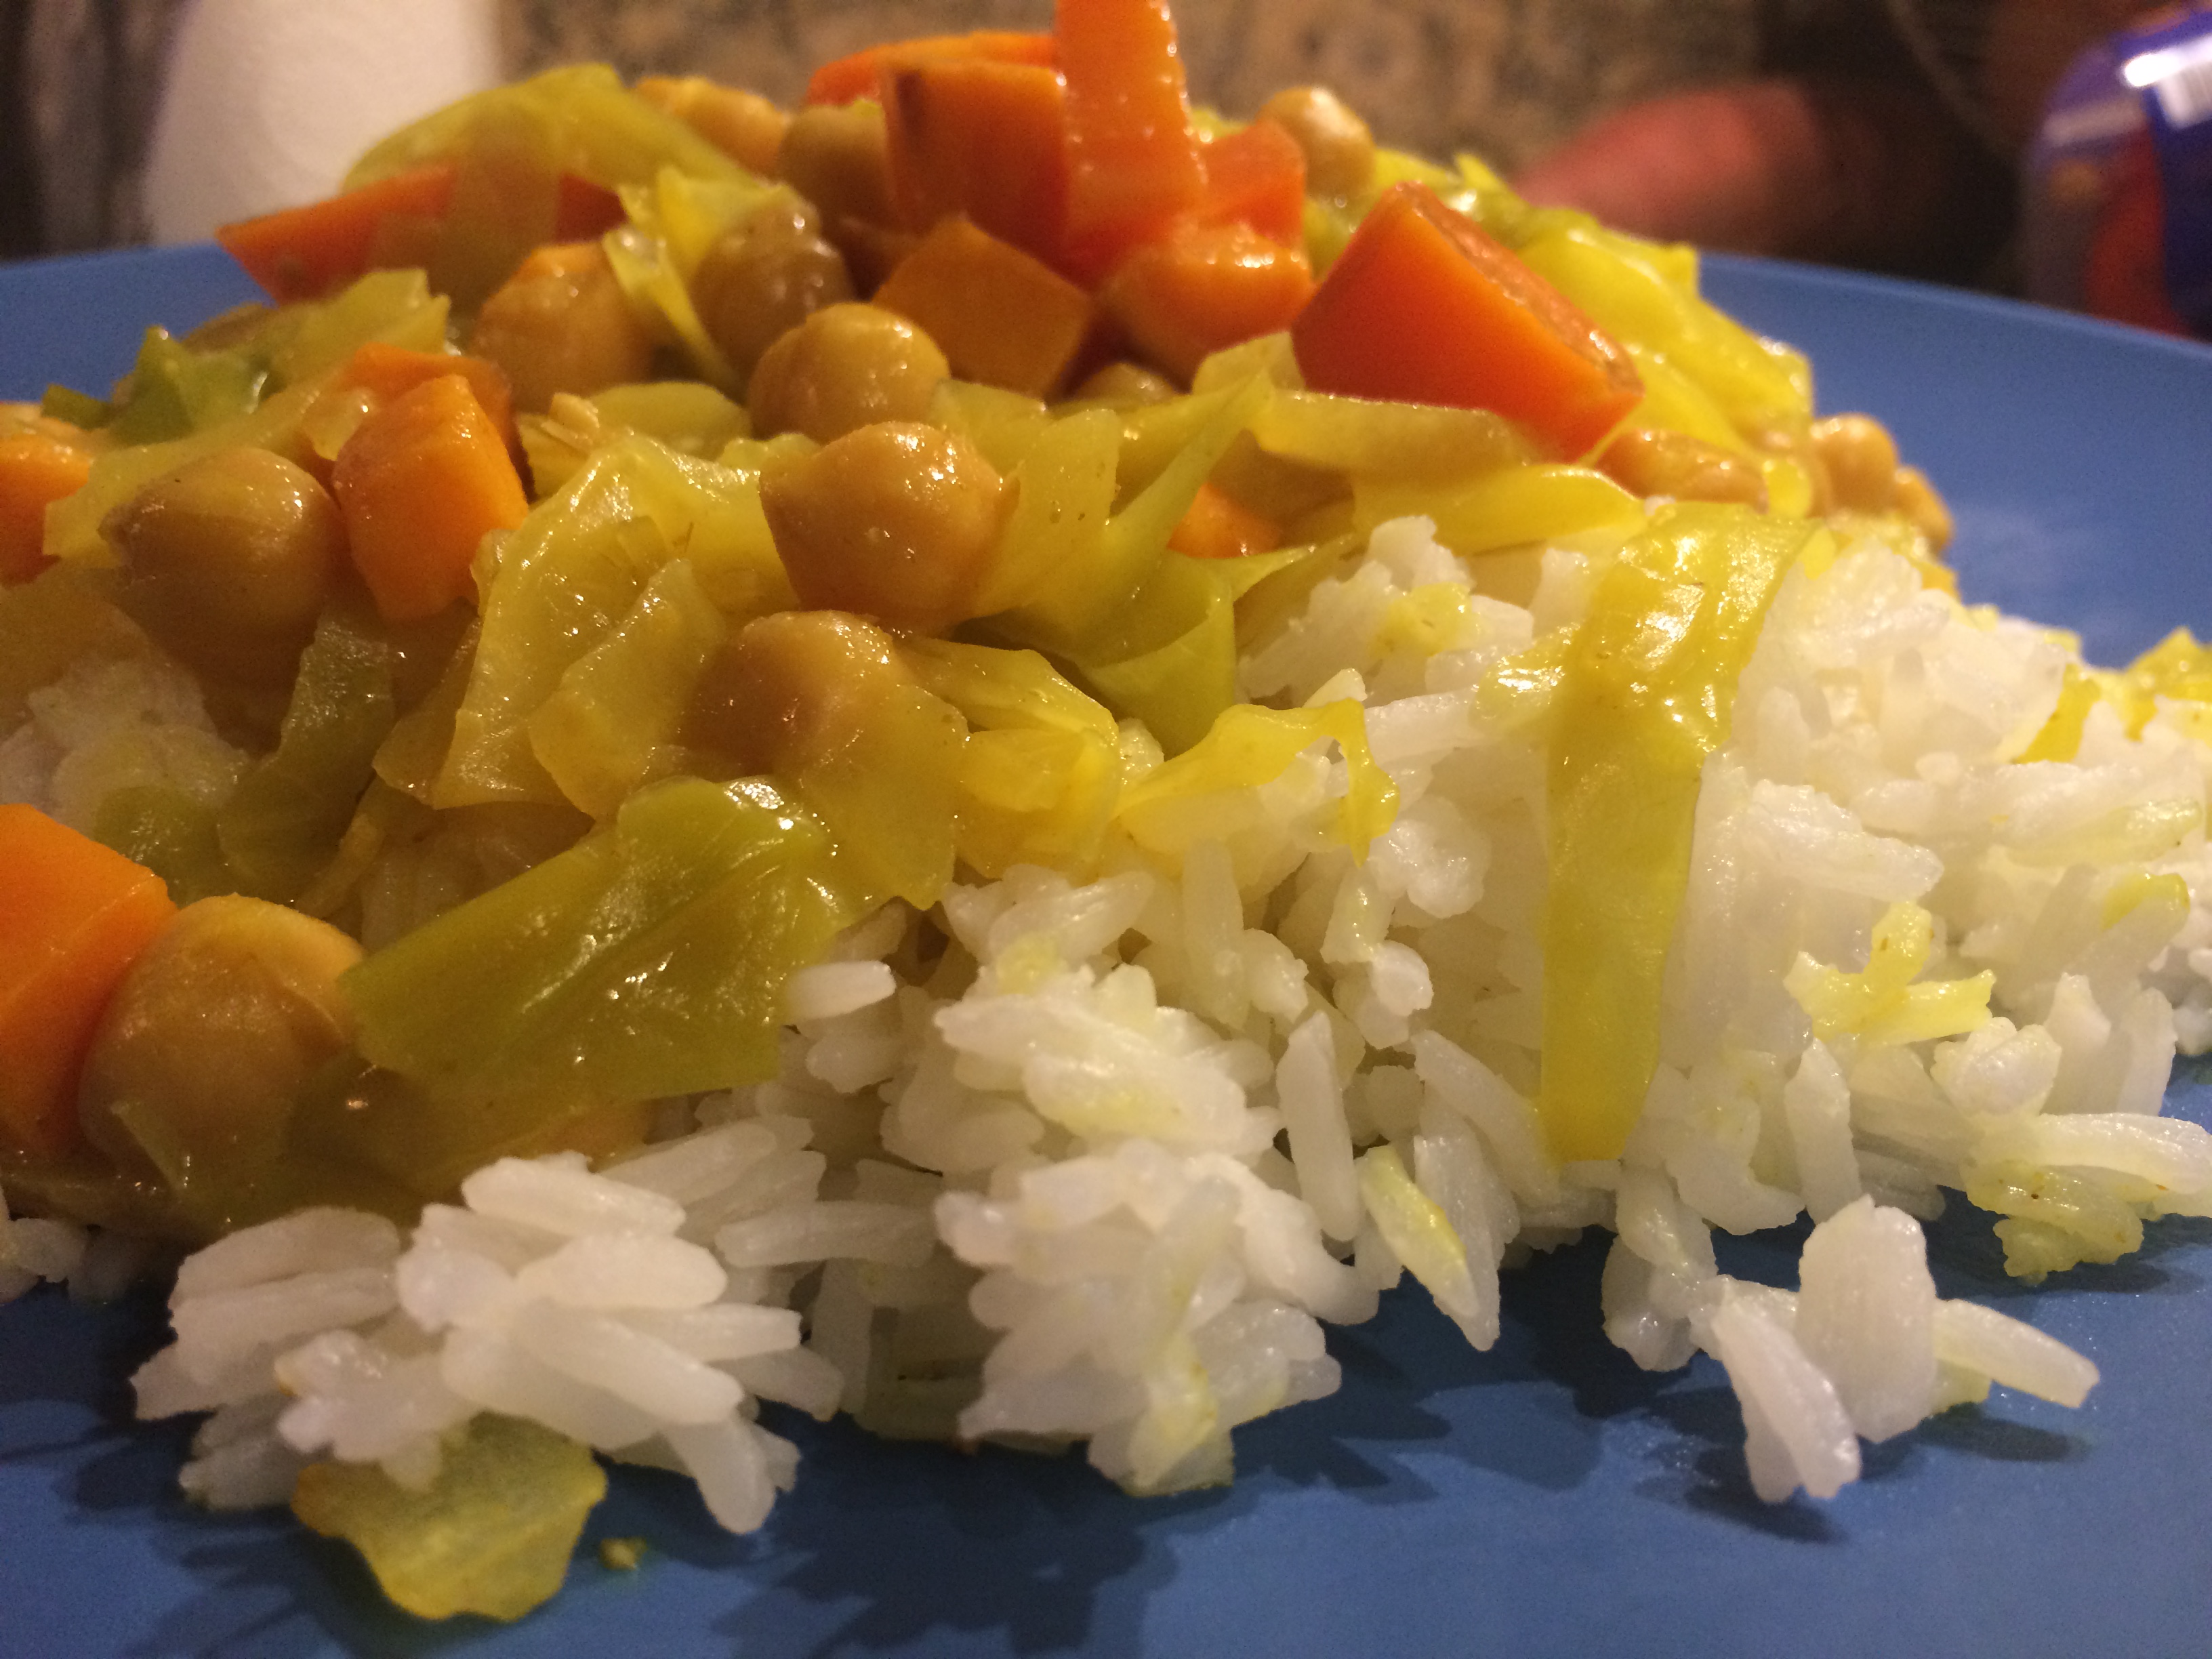
Lunch Option: Vegan Cabbage Curry

More vegan stuff!  So the reason for all the vegan recipes?  Well, a few months ago I decided to go full vegetarian (I will make exceptions on rare occasions, but for the most part I don’t eat meat anymore), and I also found out after I made that decision that I have high cholesterol!  Woo! Not enough that I need medication, but enough that some dietary changes were suggested.  I am not super strict about it since I already eat fairly healthy, but I cut out my morning yogurt and replaced it with oatmeal or a granola bar, and I try to cut out other items like dairy when I am cooking at home.  That way, I don’t have to be outrageously picky when I go out to eat.  Given the changes I’ve made, I think it will make a dent in the numbers.

I cooked this recipe for dinner one night and decided that it was better as a lunch meal.  It’s flavorful, but not enough that it left me satisfied me for dinner.  However, for lunch it is perfect because I’m not a big fan of heavy lunches.  It’s light enough to bring as a lunch and leaves me full, but not feeling sluggish.

I originally found this recipe on Healthier Steps, but modified it and added a few ingredients.  You should have about 4 days worth of lunches when you make this batch!

IMG_2323

Ingredients:

Jasmine rice – 4 servings

1/2 of a large cabbage, cut into strips

2 tbsp coconut oil

1/2 cup yellow onion, chopped

2 cloves garlic, minced

1 tsp ground coriander

1 tsp ground turmeric

1 tsp ground thyme or 2 fresh sprigs

1/2 tsp ground cumin

1 carrot, chopped

1 can of chick peas

1 cup of potatoes or sweet potatoes, chopped into small chunks

1-14oz can of light coconut milk

1/2 tsp sea salt or to taste


Instructions:

  1. Prep and cook rice.  You can have the rice cooking while you make the curry.
  2. Heat oil in a large skillet. Add onion and garlic and cook until onion is soft – about 5 minutes.
  3. Add coriander, turmeric, thyme, cumin, carrot, chick peas, potatoes, and cabbage and stir.
  4. Add coconut milk and bring to a boil.
  5. Cover saucepan and reduce to a simmer.  Cook for about 20 minutes.  Add some cornstarch if the sauce is not thick enough.

IMG_2324


Vegan Orange “Chicken” (Cauliflower)…or not vegan if you want!

Recently I’ve been trying to eat less meat, eggs, and dairy.  It’s very hard to completely cut out eggs and dairy (shoutout to the vegans out there), but the cutting out meat has been pretty easy, especially since I’ve been a vegetarian before.  My boyfriend isn’t a vegetarian, but I find it pretty easy to make us both the same dinner and just sub out my portion of meat for tofu or veggies.  I’m not picky about using the same pan or having them touch, so that makes things a lot easier.  Anyway, I came across this recipe and was very excited to make it.  By no means is it healthy, but I guess it’s slightly healthier than if you used chicken.  No matter how you slice it, you’re still deep frying something.

HOWEVER, the great part about this recipe is that if you don’t fry the cauliflower, the orange sauce is actually pretty healthy.  So, if you’re in the mood for something Chinese food-esque, I’d recommend frying the cauliflower.  If you’re looking for a quick vegan stir fry, just cook up some tofu (1/2 package) and add some frozen broccoli (170 oz for one).  If you want some legit orange chicken, just cook up some chicken (6 oz) and add some broccoli. Don’t use any cauliflower or batter. It’s that simple!

I found this recipe on Yummily Yours.  I adapted it slightly.

IMG_2322


Ingredients (serves one):

One serving of rice

6-8 florets of cauliflower

1/2 cup sliced into strips bell peppers of various colors

1/3 cup & 2 tbsp cornstarch

1/2 cup all purpose flower

1/4-1/2 cup water (to make batter)

Oil for frying

2 cloves of garlic, minced

1/4 teaspoon minced ginger

1 tablespoon orange zest

3/4 cup vegetable broth

1/2 cup freshly squeezed orange juice

2 tsp soy sauce

2 tbsp sugar

1 tsp Sriracha

Sprinkle of sesame seeds

Sprinkle of green onions


Instructions:

  1. Prepare rice – this can cook while you are making everything else.
  2. Heat oil for frying
  3. In another small frying pan, saute peppers for about 2-3 minutes.  Don’t overcook.  Set aside when done.
  4. Mix the corn starch, flour, and water to make a thick batter.  It should be thick enough to coat each cauliflower floret evenly.
  5. Coat each floret in batter and dip into the oil.
  6. Once the batter is crisp, remove the florets from the oil and place them on a paper towel to absorb extra oil.  You want them to remain crisp, so while they are cooking, you’ll want to make the sauce.
  7. Heat up the minced ginger and garlic for about a minute.  You can do this in the same pan you cooked the peppers in.
  8. Add in the orange zest.  Cook for another 30-60 seconds.
  9. Add broth, orange juice, sriracha, soy sauce, sugar and stir together.
  10. While that is heating up, mix together the 2 tablespoons of cornstarch in some cold water.
  11. Once the broth/orange juice/soy sauce/etc mixture comes to a boil, lower heat.
  12. Add in the corn starch slowly to mixture while stirring constantly.  The mixture should be very thick.
  13. Once it is thick, add in the peppers and cauliflower (or chicken/tofu + broccoli if you’re not using cauliflower).
  14. Mix well and heat everything in the pan for about 2 minutes.
  15. Put rice on a plate, and put your orange cauliflower on top. Sprinkle some sesame seeds and green onions on top.

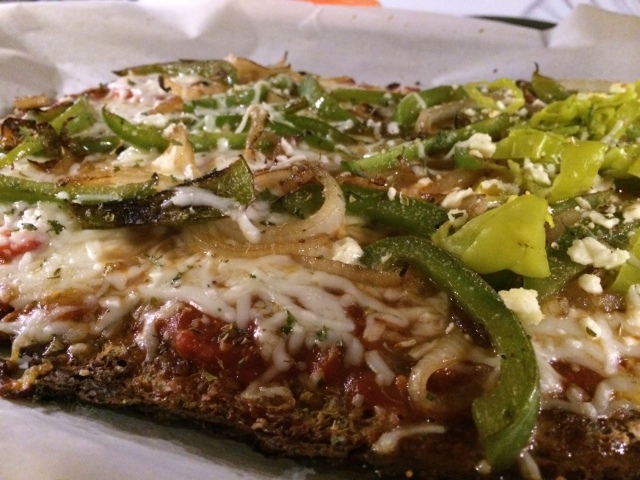
Spaghetti Squash Pizza Crust!

The time has come… Spaghetti Squash Pizza Crust is here!  This recipe is nothing short of a modern day pizza miracle.  Seriously.  While slightly labor intensive, this low calorie, low carb, high fiber crust will make your pizza become everything you want and more.  Just take my word for it and make it.  Inspired by: Delighted Momma

spaghetti squash pizza 2 spaghetti squash pizza 3 spaghetti squash pizza

Ingredients:

  • 2 1/2 cups of spaghetti squash (about 1 very large spaghetti squash or two smaller sized ones)
  • 1 egg
  • 1/4 tsp of garlic salt
  • 1 cup of mozzarella cheese
  • 1/4 cup of flax meal

Directions:

  1. Preheat your oven to 400 degrees.
  2. Cook your spaghetti squash however you prefer (see my post on cooking spaghetti squash).
  3. Once your spaghetti squash is cooked, use a fork scrape out the insides.  You will now need to squeeze out as much water from the spaghetti squash as possible.  This is very important if you do not want a mushy pizza crust (it is also the most time consuming part of the recipe).  I have found that placing the spaghetti squash in a strainer as it cools is helpful, as well as using two cutting boards to squeeze the squash, just squeezing it with my hands in fist fulls, and using paper towels to absorb extra moisture.
  4. Combine the spaghetti squash and all the other ingredients listed above with your hands.
  5. Line a baking sheet or pizza pan with parchment paper and evenly spread your mixture on it. Make sure you keep the dough pressed together firmly as you spread.
  6. Bake your pizza crust for 25- 30 minutes or until you notice the edges starting to brown.  At the end of the 30 minutes carefully flip your crust and continue to bake for additional 25-30 minutes until pizza is no longer mushy and fully baked through.
  7. Take your crust out and spread on pizza sauce and whatever toppings you love.  Place it back it the oven for a few more minutes to let everything melt and get all bubbly.

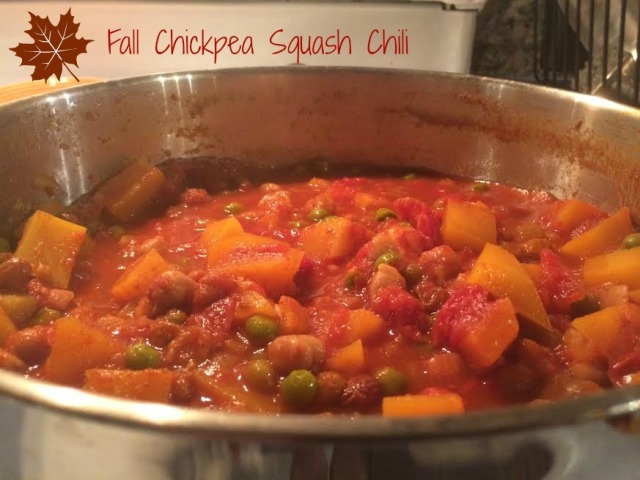
Fall Chickpea Squash Chili

Fall recipe time!  I would definitely consider this chili a fall recipe since it uses butternut squash (for some reason squash equates to fall and winter in my mind).  I waited to post this until fall for this reason because I actually made it this summer (breaking all the rules!).  We had leftover butternut squash from this mac & cheese recipe I made a few days earlier.  I originally followed the “seasonality rules” with this two falls ago when I was living in Boston and wanted to make a fall dish (which was a surprise to myself since I wasn’t big on complicated recipes).  Similar with baking, I was never super into cooking elaborate dishes, but for some reason I saw the squash at a farmer’s market and found this particular recipe for Chickpea Chili calling to me.  It turns out that I really enjoyed cooking it and suddenly cooking became a lot less scary and a lot more interesting.  The original recipe can be found from Cooking Light and requires a crock pot and around 9 hours of simmering, but it can definitely be made in a medium-large pot with 3-5 hours of simmering.  It’s a great dish to make on a Sunday afternoon when you don’t have any plans and it fills the entire house up with a lovely aroma of spices.  It also keeps well and tastes excellent heated up!  And the great part is that you WILL have leftovers from this recipe!
Chickpea & Squash Chili - cooking edit


Ingredients:
1 cup canned chickpeas
2 tbs olive oil (or cooking spray if you want to keep it very healthy)
1 1/2 cups chopped onion
5 garlic cloves, minced
1 tbs tomato paste
1 1/2 tsp ground cumin
1 tsp salt
1/2 tsp crushed red pepper flakes
1/2 tsp ground cinnamon
1/4 tsp ground tumeric
2 1/2 cups fat-free lower-sodium chicken broth
1/2 cup water
1/2 cup golden raisins
1 (28-ounce) can crushed tomatoes (undrained)
4 cups chopped butternut squash
1 cup frozen peas, thawed
6 cups hot couscous
8 lime wedges
1/4 cup chopped fresh cilantro

Directions:

  1. Heat a large skillet over medium-high heat. Add 1 tablespoon oil to pan (or cooking spray). Add onion; sauté 4 minutes, stirring occasionally. Add garlic; sauté 1 minute, stirring constantly. Stir in tomato paste and next 5 ingredients (through turmeric); sauté 30 seconds, stirring constantly.
  2. Add onion mixture to slow cooker.  If you don’t have a slow cooker, you can use a large pot (which is what I used).   Add broth and next 4 ingredients (through tomatoes); cover and cook on HIGH 8 hours.  Or, if you are using a pot, 4-5 hours.
  3. Heat a large skillet over medium-high heat. Add remaining 1 tablespoon oil; swirl to coat. Add squash and sauté 5 minutes. Add squash to slow cooker/pot. Cover and cook on HIGH 1 hour, or low-medium heat.  Stir in peas. Sprinkle with cilantro. Serve over couscous with lime wedges!

Chickpea & Squash Chili - plate 2!Chickpea & Squash Chili - plate!

The Greatest Not-So-Bad-For-You Mac & Cheese

This is quite possibly the best mac & cheese recipe I’ve come across.  AND it’s not THAT bad for you.  The original recipe is labeled as “light” and it’s from Cooking Light, but of course all cheese is pretty fattening, so I don’t really like to label any type of mac & cheese dish “light” … hence the “not-so-bad-for-you” label.  This recipe combines some cheese with squash and Greek yogurt, so you still get that creamy texture, but not as bad as traditional mac & cheese.  If you’d like to make it even healthier, you can make it with spaghetti squash like I did here. Original recipe can be found here.

mac cheese 12

Ingredients:
3 cups cubed peeled butternut squash (about 1 [1-pound] squash)
1 1/4 cups fat-free, lower-sodium chicken broth
1 1/2 cups 1% milk
2 garlic cloves, peeled
2 tablespoons plain fat-free Greek yogurt
1 teaspoon salt
1/2 teaspoon freshly ground black pepper
1 1/4 cups shredded Gruyère cheese
1 cup grated Romano cheese
1/4 cup finely grated fresh Parmigiano-Reggiano cheese
Cooking spray
1 teaspoon olive oil
1/2 cup panko (Japanese breadcrumbs)
2 tablespoons dried parsley
1 spaghetti squash or 1 pound cavatappi pasta

Directions:
1. Preheat oven to 375°.
2. Combine butternut squash, broth, milk, and garlic in a medium saucepan; bring to a boil over medium-high heat. Reduce heat to medium, and simmer until squash is tender when pierced with a fork (about 25 minutes).
3. Place the hot squash mixture in a blender. Add salt, pepper, and Greek yogurt and blend until smooth. Place blended squash mixture in a bowl; stir in Gruyère, pecorino Romano, and 2 tablespoons Parmigiano-Reggiano. Stir until combined.
4. Cook pasta according to package directions OR cook spaghetti squash.  (If you’re unfamiliar about how to cook spaghetti squash, please see my past post here).  Add pasta/spaghetti squash to butternut squash mixture, and stir until combined. Spread mixture evenly into a 13 x 9-inch glass or ceramic baking dish coated with cooking spray.
5. Heat a small pan coated with cooking spray over medium heat. Add panko, and cook for 4-5 minutes or until golden brown. Remove from heat and stir in remaining 2 tablespoons Parmigiano-Reggiano cheese. Sprinkle evenly over the hot pasta or spaghetti squash mixture. Lightly coat topping with cooking spray.
6. Bake at 375° for 25 minutes or until bubbly. Sprinkle with parsley, and serve!

mac cheese

How To Cook Spaghetti Squash

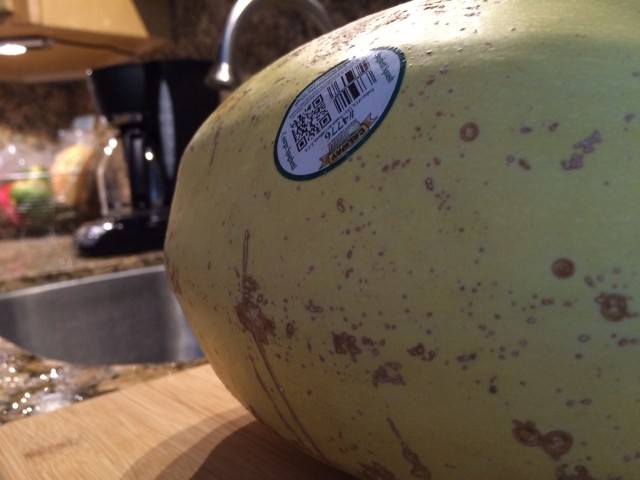
Spaghetti squash could possibly be the most amazing vegetable on the planet.  I thought it would be beneficial to do a post on cooking spaghetti squash because I do cook a lot of recipes that involve it.  It’s pretty easy to cook and the hardest part is getting the squash open.  So, without further ado, here’s how you cook a spaghetti squash in 5 simple steps.

1. Buy spaghetti squash (that one’s pretty self explanatory).

How to cook spaghetti squash 4

2. Cut spaghetti squash open length-wise.  This can be a little tricky and involves some semi-dangerous knife-work, so be careful!

How to cook spaghetti squash 5

3. Scoop out the seeds/middle of the squash.

How to cook spaghetti squash 2

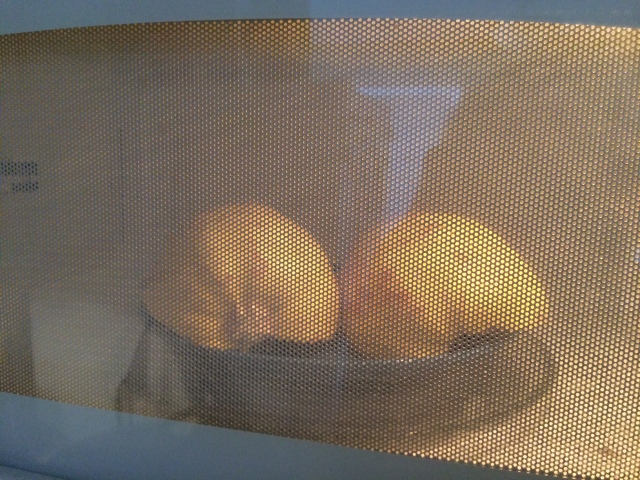
4. Place spaghetti squash flat side down on a plate and microwave for 10-12 minutes.

How to cook spaghetti squash 3

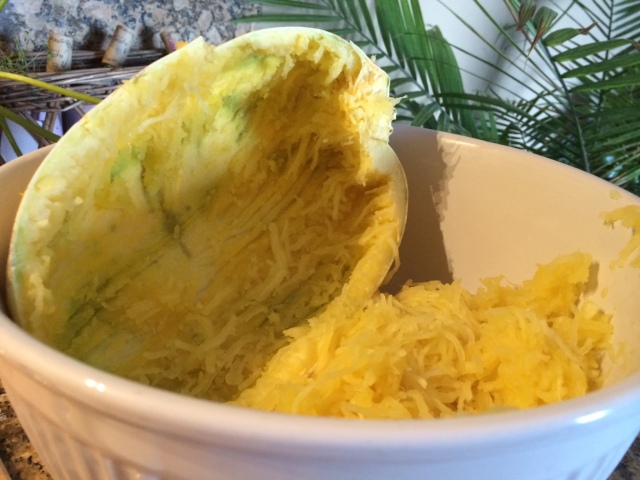
5. Use a fork to scrape the squash part out of the skin and into a bowl.  Voila!  You have your “spaghetti!”

How to cook spaghetti squash 1

***Update – You can also cook it in the oven at 375 for 45-1 hour.  I have also read in the past that cutting the sides off (where the stem is) might make it easier to cut length-wise.  I have also read that microwaving the entire squash for a 2-3 minutes might soften it up and make it easier to cut in half.