Lunch Option: Vegan Cabbage Curry

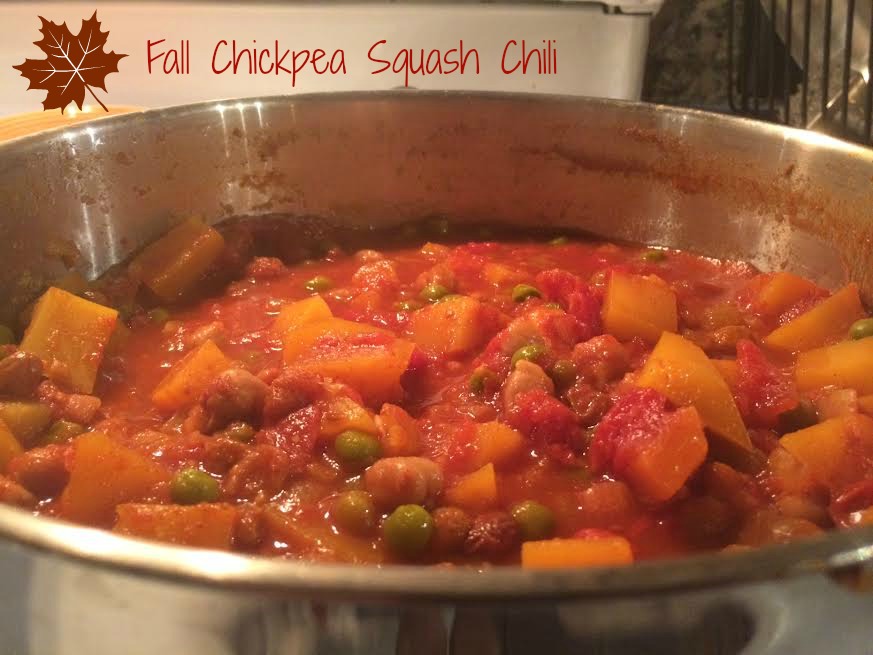
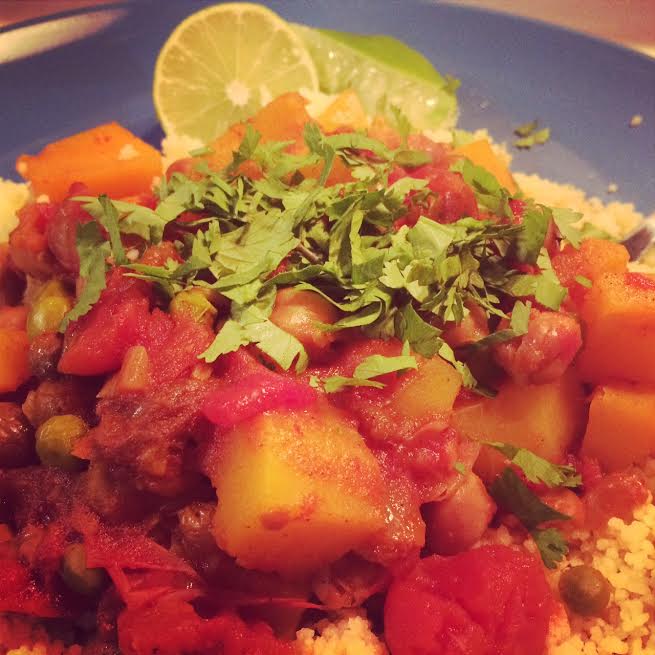
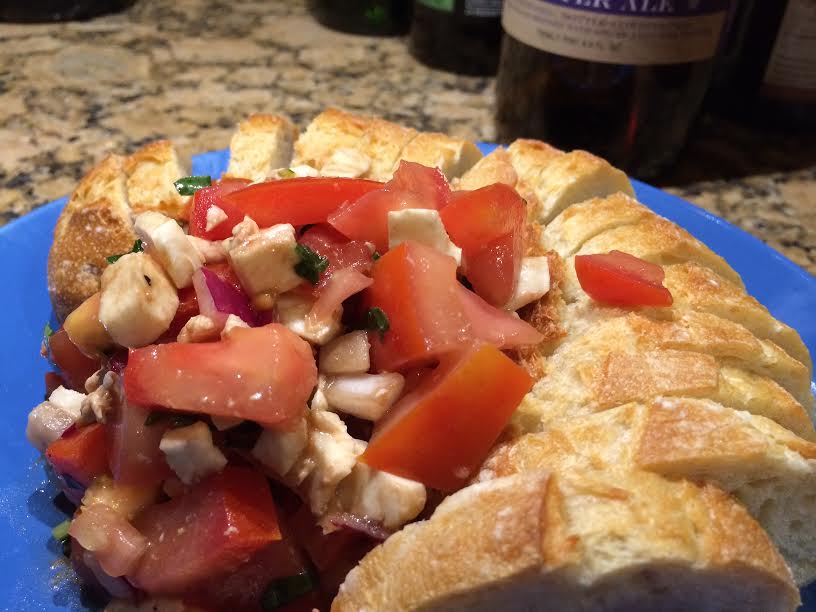
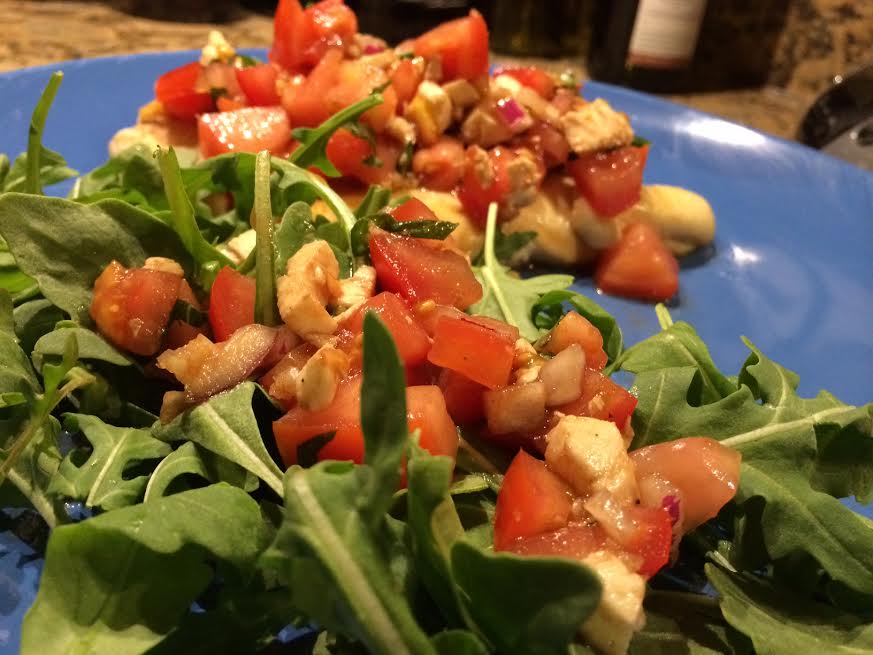
More vegan stuff!  So the reason for all the vegan recipes?  Well, a few months ago I decided to go full vegetarian (I will make exceptions on rare occasions, but for the most part I don’t eat meat anymore), and I also found out after I made that decision that I have high cholesterol!  Woo! Not enough that I need medication, but enough that some dietary changes were suggested.  I am not super strict about it since I already eat fairly healthy, but I cut out my morning yogurt and replaced it with oatmeal or a granola bar, and I try to cut out other items like dairy when I am cooking at home.  That way, I don’t have to be outrageously picky when I go out to eat.  Given the changes I’ve made, I think it will make a dent in the numbers.

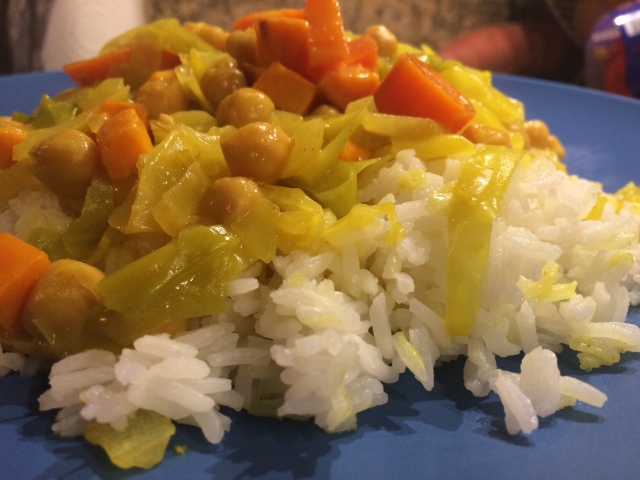
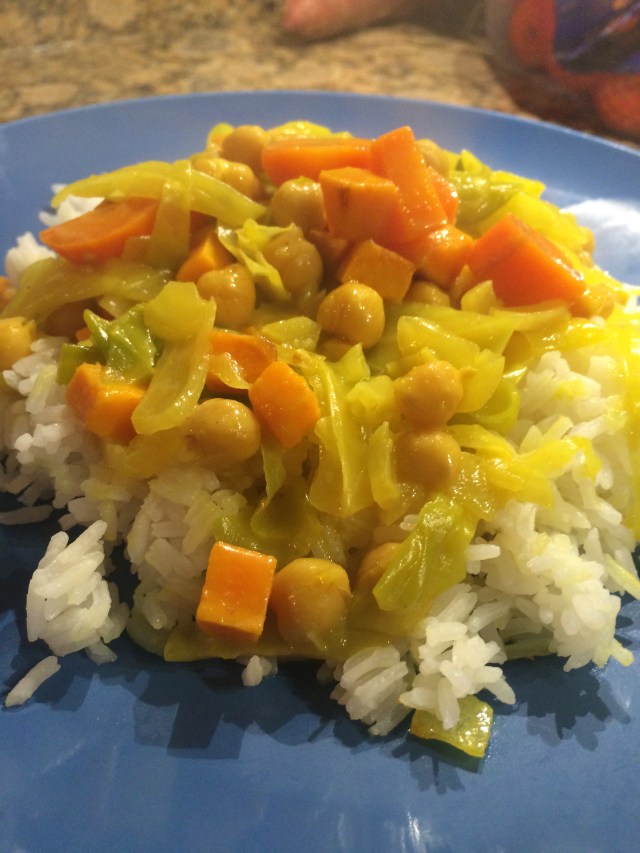
I cooked this recipe for dinner one night and decided that it was better as a lunch meal.  It’s flavorful, but not enough that it left me satisfied me for dinner.  However, for lunch it is perfect because I’m not a big fan of heavy lunches.  It’s light enough to bring as a lunch and leaves me full, but not feeling sluggish.

I originally found this recipe on Healthier Steps, but modified it and added a few ingredients.  You should have about 4 days worth of lunches when you make this batch!

IMG_2323

Ingredients:

Jasmine rice – 4 servings

1/2 of a large cabbage, cut into strips

2 tbsp coconut oil

1/2 cup yellow onion, chopped

2 cloves garlic, minced

1 tsp ground coriander

1 tsp ground turmeric

1 tsp ground thyme or 2 fresh sprigs

1/2 tsp ground cumin

1 carrot, chopped

1 can of chick peas

1 cup of potatoes or sweet potatoes, chopped into small chunks

1-14oz can of light coconut milk

1/2 tsp sea salt or to taste


Instructions:

  1. Prep and cook rice.  You can have the rice cooking while you make the curry.
  2. Heat oil in a large skillet. Add onion and garlic and cook until onion is soft – about 5 minutes.
  3. Add coriander, turmeric, thyme, cumin, carrot, chick peas, potatoes, and cabbage and stir.
  4. Add coconut milk and bring to a boil.
  5. Cover saucepan and reduce to a simmer.  Cook for about 20 minutes.  Add some cornstarch if the sauce is not thick enough.

IMG_2324


Vegan Orange “Chicken” (Cauliflower)…or not vegan if you want!

Recently I’ve been trying to eat less meat, eggs, and dairy.  It’s very hard to completely cut out eggs and dairy (shoutout to the vegans out there), but the cutting out meat has been pretty easy, especially since I’ve been a vegetarian before.  My boyfriend isn’t a vegetarian, but I find it pretty easy to make us both the same dinner and just sub out my portion of meat for tofu or veggies.  I’m not picky about using the same pan or having them touch, so that makes things a lot easier.  Anyway, I came across this recipe and was very excited to make it.  By no means is it healthy, but I guess it’s slightly healthier than if you used chicken.  No matter how you slice it, you’re still deep frying something.

HOWEVER, the great part about this recipe is that if you don’t fry the cauliflower, the orange sauce is actually pretty healthy.  So, if you’re in the mood for something Chinese food-esque, I’d recommend frying the cauliflower.  If you’re looking for a quick vegan stir fry, just cook up some tofu (1/2 package) and add some frozen broccoli (170 oz for one).  If you want some legit orange chicken, just cook up some chicken (6 oz) and add some broccoli. Don’t use any cauliflower or batter. It’s that simple!

I found this recipe on Yummily Yours.  I adapted it slightly.

IMG_2322


Ingredients (serves one):

One serving of rice

6-8 florets of cauliflower

1/2 cup sliced into strips bell peppers of various colors

1/3 cup & 2 tbsp cornstarch

1/2 cup all purpose flower

1/4-1/2 cup water (to make batter)

Oil for frying

2 cloves of garlic, minced

1/4 teaspoon minced ginger

1 tablespoon orange zest

3/4 cup vegetable broth

1/2 cup freshly squeezed orange juice

2 tsp soy sauce

2 tbsp sugar

1 tsp Sriracha

Sprinkle of sesame seeds

Sprinkle of green onions


Instructions:

  1. Prepare rice – this can cook while you are making everything else.
  2. Heat oil for frying
  3. In another small frying pan, saute peppers for about 2-3 minutes.  Don’t overcook.  Set aside when done.
  4. Mix the corn starch, flour, and water to make a thick batter.  It should be thick enough to coat each cauliflower floret evenly.
  5. Coat each floret in batter and dip into the oil.
  6. Once the batter is crisp, remove the florets from the oil and place them on a paper towel to absorb extra oil.  You want them to remain crisp, so while they are cooking, you’ll want to make the sauce.
  7. Heat up the minced ginger and garlic for about a minute.  You can do this in the same pan you cooked the peppers in.
  8. Add in the orange zest.  Cook for another 30-60 seconds.
  9. Add broth, orange juice, sriracha, soy sauce, sugar and stir together.
  10. While that is heating up, mix together the 2 tablespoons of cornstarch in some cold water.
  11. Once the broth/orange juice/soy sauce/etc mixture comes to a boil, lower heat.
  12. Add in the corn starch slowly to mixture while stirring constantly.  The mixture should be very thick.
  13. Once it is thick, add in the peppers and cauliflower (or chicken/tofu + broccoli if you’re not using cauliflower).
  14. Mix well and heat everything in the pan for about 2 minutes.
  15. Put rice on a plate, and put your orange cauliflower on top. Sprinkle some sesame seeds and green onions on top.

Spaghetti Squash Pizza Crust!

The time has come… Spaghetti Squash Pizza Crust is here!  This recipe is nothing short of a modern day pizza miracle.  Seriously.  While slightly labor intensive, this low calorie, low carb, high fiber crust will make your pizza become everything you want and more.  Just take my word for it and make it.  Inspired by: Delighted Momma

spaghetti squash pizza 2 spaghetti squash pizza 3 spaghetti squash pizza

Ingredients:

  • 2 1/2 cups of spaghetti squash (about 1 very large spaghetti squash or two smaller sized ones)
  • 1 egg
  • 1/4 tsp of garlic salt
  • 1 cup of mozzarella cheese
  • 1/4 cup of flax meal

Directions:

  1. Preheat your oven to 400 degrees.
  2. Cook your spaghetti squash however you prefer (see my post on cooking spaghetti squash).
  3. Once your spaghetti squash is cooked, use a fork scrape out the insides.  You will now need to squeeze out as much water from the spaghetti squash as possible.  This is very important if you do not want a mushy pizza crust (it is also the most time consuming part of the recipe).  I have found that placing the spaghetti squash in a strainer as it cools is helpful, as well as using two cutting boards to squeeze the squash, just squeezing it with my hands in fist fulls, and using paper towels to absorb extra moisture.
  4. Combine the spaghetti squash and all the other ingredients listed above with your hands.
  5. Line a baking sheet or pizza pan with parchment paper and evenly spread your mixture on it. Make sure you keep the dough pressed together firmly as you spread.
  6. Bake your pizza crust for 25- 30 minutes or until you notice the edges starting to brown.  At the end of the 30 minutes carefully flip your crust and continue to bake for additional 25-30 minutes until pizza is no longer mushy and fully baked through.
  7. Take your crust out and spread on pizza sauce and whatever toppings you love.  Place it back it the oven for a few more minutes to let everything melt and get all bubbly.

Fall Chickpea Squash Chili

Fall recipe time!  I would definitely consider this chili a fall recipe since it uses butternut squash (for some reason squash equates to fall and winter in my mind).  I waited to post this until fall for this reason because I actually made it this summer (breaking all the rules!).  We had leftover butternut squash from this mac & cheese recipe I made a few days earlier.  I originally followed the “seasonality rules” with this two falls ago when I was living in Boston and wanted to make a fall dish (which was a surprise to myself since I wasn’t big on complicated recipes).  Similar with baking, I was never super into cooking elaborate dishes, but for some reason I saw the squash at a farmer’s market and found this particular recipe for Chickpea Chili calling to me.  It turns out that I really enjoyed cooking it and suddenly cooking became a lot less scary and a lot more interesting.  The original recipe can be found from Cooking Light and requires a crock pot and around 9 hours of simmering, but it can definitely be made in a medium-large pot with 3-5 hours of simmering.  It’s a great dish to make on a Sunday afternoon when you don’t have any plans and it fills the entire house up with a lovely aroma of spices.  It also keeps well and tastes excellent heated up!  And the great part is that you WILL have leftovers from this recipe!

Chickpea & Squash Chili - cooking edit


Ingredients:
1 cup canned chickpeas
2 tbs olive oil (or cooking spray if you want to keep it very healthy)
1 1/2 cups chopped onion
5 garlic cloves, minced
1 tbs tomato paste
1 1/2 tsp ground cumin
1 tsp salt
1/2 tsp crushed red pepper flakes
1/2 tsp ground cinnamon
1/4 tsp ground tumeric
2 1/2 cups fat-free lower-sodium chicken broth
1/2 cup water
1/2 cup golden raisins
1 (28-ounce) can crushed tomatoes (undrained)
4 cups chopped butternut squash
1 cup frozen peas, thawed
6 cups hot couscous
8 lime wedges
1/4 cup chopped fresh cilantro

Directions:

  1. Heat a large skillet over medium-high heat. Add 1 tablespoon oil to pan (or cooking spray). Add onion; sauté 4 minutes, stirring occasionally. Add garlic; sauté 1 minute, stirring constantly. Stir in tomato paste and next 5 ingredients (through turmeric); sauté 30 seconds, stirring constantly.
  2. Add onion mixture to slow cooker.  If you don’t have a slow cooker, you can use a large pot (which is what I used).   Add broth and next 4 ingredients (through tomatoes); cover and cook on HIGH 8 hours.  Or, if you are using a pot, 4-5 hours.
  3. Heat a large skillet over medium-high heat. Add remaining 1 tablespoon oil; swirl to coat. Add squash and sauté 5 minutes. Add squash to slow cooker/pot. Cover and cook on HIGH 1 hour, or low-medium heat.  Stir in peas. Sprinkle with cilantro. Serve over couscous with lime wedges!

Chickpea & Squash Chili - plate 2!Chickpea & Squash Chili - plate!

The Greatest Not-So-Bad-For-You Mac & Cheese

This is quite possibly the best mac & cheese recipe I’ve come across.  AND it’s not THAT bad for you.  The original recipe is labeled as “light” and it’s from Cooking Light, but of course all cheese is pretty fattening, so I don’t really like to label any type of mac & cheese dish “light” … hence the “not-so-bad-for-you” label.  This recipe combines some cheese with squash and Greek yogurt, so you still get that creamy texture, but not as bad as traditional mac & cheese.  If you’d like to make it even healthier, you can make it with spaghetti squash like I did here. Original recipe can be found here.

mac cheese 12

Ingredients:
3 cups cubed peeled butternut squash (about 1 [1-pound] squash)
1 1/4 cups fat-free, lower-sodium chicken broth
1 1/2 cups 1% milk
2 garlic cloves, peeled
2 tablespoons plain fat-free Greek yogurt
1 teaspoon salt
1/2 teaspoon freshly ground black pepper
1 1/4 cups shredded Gruyère cheese
1 cup grated Romano cheese
1/4 cup finely grated fresh Parmigiano-Reggiano cheese
Cooking spray
1 teaspoon olive oil
1/2 cup panko (Japanese breadcrumbs)
2 tablespoons dried parsley
1 spaghetti squash or 1 pound cavatappi pasta

Directions:
1. Preheat oven to 375°.
2. Combine butternut squash, broth, milk, and garlic in a medium saucepan; bring to a boil over medium-high heat. Reduce heat to medium, and simmer until squash is tender when pierced with a fork (about 25 minutes).
3. Place the hot squash mixture in a blender. Add salt, pepper, and Greek yogurt and blend until smooth. Place blended squash mixture in a bowl; stir in Gruyère, pecorino Romano, and 2 tablespoons Parmigiano-Reggiano. Stir until combined.
4. Cook pasta according to package directions OR cook spaghetti squash.  (If you’re unfamiliar about how to cook spaghetti squash, please see my past post here).  Add pasta/spaghetti squash to butternut squash mixture, and stir until combined. Spread mixture evenly into a 13 x 9-inch glass or ceramic baking dish coated with cooking spray.
5. Heat a small pan coated with cooking spray over medium heat. Add panko, and cook for 4-5 minutes or until golden brown. Remove from heat and stir in remaining 2 tablespoons Parmigiano-Reggiano cheese. Sprinkle evenly over the hot pasta or spaghetti squash mixture. Lightly coat topping with cooking spray.
6. Bake at 375° for 25 minutes or until bubbly. Sprinkle with parsley, and serve!

mac cheese

How To Cook Spaghetti Squash

Spaghetti squash could possibly be the most amazing vegetable on the planet.  I thought it would be beneficial to do a post on cooking spaghetti squash because I do cook a lot of recipes that involve it.  It’s pretty easy to cook and the hardest part is getting the squash open.  So, without further ado, here’s how you cook a spaghetti squash in 5 simple steps.

1. Buy spaghetti squash (that one’s pretty self explanatory).

How to cook spaghetti squash 4

2. Cut spaghetti squash open length-wise.  This can be a little tricky and involves some semi-dangerous knife-work, so be careful!

How to cook spaghetti squash 5

3. Scoop out the seeds/middle of the squash.

How to cook spaghetti squash 2

4. Place spaghetti squash flat side down on a plate and microwave for 10-12 minutes.

How to cook spaghetti squash 3

5. Use a fork to scrape the squash part out of the skin and into a bowl.  Voila!  You have your “spaghetti!”

How to cook spaghetti squash 1

***Update – You can also cook it in the oven at 375 for 45-1 hour.  I have also read in the past that cutting the sides off (where the stem is) might make it easier to cut length-wise.  I have also read that microwaving the entire squash for a 2-3 minutes might soften it up and make it easier to cut in half.

Chicken Pineapple Fajita Lettuce Cups

Back in my Boston days I came across these skillet sauces by Rick Bayless at the Star Market near my apartment.  I don’t know what prompted me to try it out, but I instantly fell in love.  The Star Market only carried two, the New Mexico Taco Skillet Sauce with roasted tomato + mild red chilies for chicken and the Key Lime Cilantro Taco Skillet Sauce with roasted tomatillo + green chile for shrimp.  I tried both, and the red sauce instantly became my favorite because it tastes really great with chicken (as it was meant for).  I made the Key Lime Cilantro with chicken and it was definitely good (but probably a ton better with shrimp), but the red one really became my favorite and a staple for me.  I’ve never really seen these anywhere outside of that Star Market on Beacon Street.  That is, UNTIL LAST WEEK.  ANNOUNCEMENT: SAFEWAY IN SAN FRANCISCO NOW CARRIES THESE.  I REPEAT – AS OF LAST WEEK, SAFEWAY IN SAN FRANCISCO NOW CARRIES THESE.  At least, the one in Duboce Triangle.  I know most of you don’t live around here, but I’d definitely recommend taking a look at your local grocery store and see if they have these because I really enjoy them!  They are better than the classic dry taco seasoning and pretty low calorie (25 cal & 5 cals from fat per two tablespoons).  This recipe is one I came up with in Boston using the New Mexico Taco Skillet Sauce with roasted tomato + mild red chilies.  It’s a really great summer dish and goes great with lettuce cups instead of tortillas if you want to keep it super low-cal and carb free.  Feel free to use tortillas instead, though!  Also tastes great with some guac and salsa (particularly Newman’s Own Peach Salsa – my favorite, which, unfortunately, I have yet to find in San Francisco) and even a side of chips!

333333333333333333333


Ingredients (serves two):
12 oz chicken
One red pepper
One green pepper
1/2 of a large onion (or enough to match the amount of each pepper)
1/2 a bag of New Mexico Taco Skillet Sauce with roasted tomato + mild red chilies for chicken
8 oz pineapple chunks
Cooking spray
Iceberg lettuce (or tortillas)
Guac + Salsa (optional)

Instructions:
1. Cut up peppers and onions and spray cooking spray into a large skillet.
2. Cook peppers and onions until soft, but still a little crispy (approx 10-15 minutes).  About half way through, add a little bit of skillet sauce to veggies (enough to coat them).

4444444444444444444
3. Place peppers and onions aside and spray pan with cooking spray again.  Cook chicken all the way through, adding a little more skillet sauce when chicken is almost finished cooking.

5555555555555555555

4. When chicken is finished, put veggies back in the skillet with the chicken and add the rest of the skillet sauce (1/2 the bag!).  Cook for another 5-10 minutes.

1111111111111111

5. Add in pineapples to skillet a minute or two you are ready to plate.
6. Plate and eat with lettuce cups (or tortillas) and your sides (guac, salsa, and maybe some chips!!).

2222222222222222222222


Bruschetta + Grilled Chicken

A healthy protein filled bruschetta dinner!  This is a really delicious bruschetta recipe that tastes just like what you’d get in a nice Italian restaurant.  I really like bread, so I doubled the bruschetta recipe below to make a bruschetta appetizer with bread.  Outside of the bruschetta, this dish is super simple, being comprised of basically a grilled/broiled chicken breast and a side arugula salad (with more bruschetta on top, of course!).  If you want to make an appetizer plus the chicken dinner for two, I would recommend doubling the bruschetta recipe, but if you want just the chicken + bruschetta + some for the salad for two, or just bruschetta, the recipe below is MORE than enough.  Plus, it is very healthy, especially if you use part skim mozzarella! Thanks to Skinny Taste for the recipe!
bruchick4

Ingredients:

3 medium vine ripe tomatoes
2 cloves of garlic, pressed
1/4 cup chopped red onion
2 tbsp fresh basil leaves, chopped
1 tbsp extra virgin olive oil
1 tbsp balsamic vinegar
salt and pepper to taste
3 oz part skim mozzarella, diced
2 chicken breasts
4 cups arugula
bread (optional)

Instructions:

1. Combine onion, olive oil, balsamic vinegar, salt and pepper.  Set aside.
2. Chop tomatoes and place into a large bowl.
3. Combine with garlic, basil, and onion-balsamic mixture from step 1.  Set aside to sit at least 10 minutes or as long as overnight.
4.  Add in the mozzarella cheese when ready to serve.  Your bruschetta is complete!
5. Season the chicken with salt and pepper.  Grill or broil (or cook however you please, really!) the chicken and top with the bruschetta.
6. Add arugula and top with some bruschetta. Serve!
 

bruchick3bruchick2bruchick