
My boyfriend and I live in a small-ish apartment here in San Francisco. I say small-ish because it’s not actually that small by city standards. It’s a really decent sized one bedroom, but with two people, a dog with a crate, two sets of golf clubs (you get where I’m going), that can sometimes feel a little crowded. Since moving here we’ve acquired a lot of stuff, which has made it feel a little smaller. Anyway, finding space for our belongings and hobbies can sometimes be like trying to fit pieces of a puzzle together. And, that only gets harder around the holidays because of decorations!
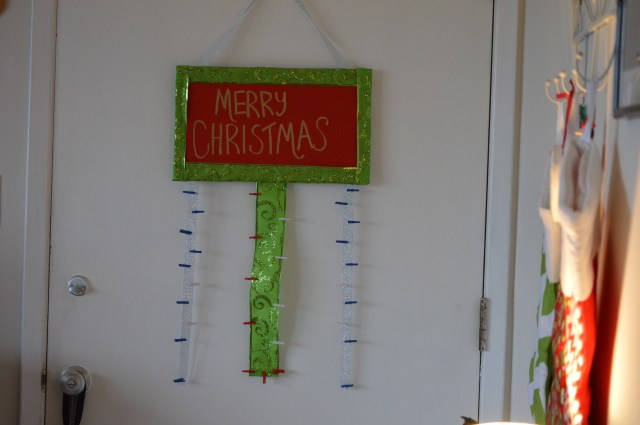
I always try to send holiday cards and I love it when people send them to us! Over the years I’ve been having a hard time finding a place to display the cards we receive. The real estate for cards becomes even thinner because my boyfriend’s birthday is also in December. I’ve been meaning to invest in a card holder for the door or wall, but instead of buying one, I decided to make one. It was pretty simple and here’s how you can make one too!
What you’ll need:
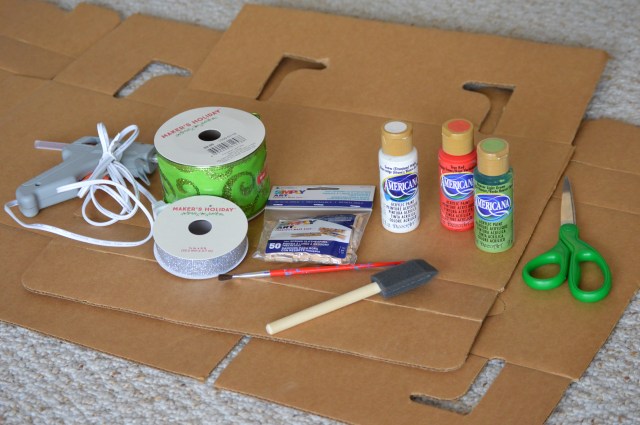
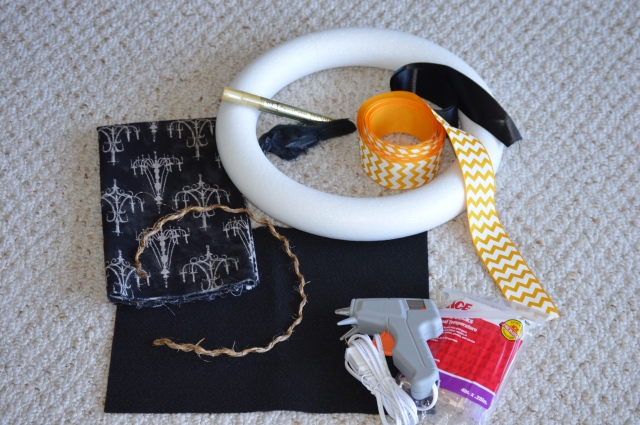
Cardboard
Paint (I used white, blue, and red)
Scissors
Paint brushes
Gold paint pen
Mini clothespins
Hot Glue Gun
Ribbon – I used a lighter ribbon for two hanging strips, but if you are not going to put cardboard behind the hanging strips, I’d recommend using ribbon with wire in it. My middle strip uses wire ribbon.
Instructions:
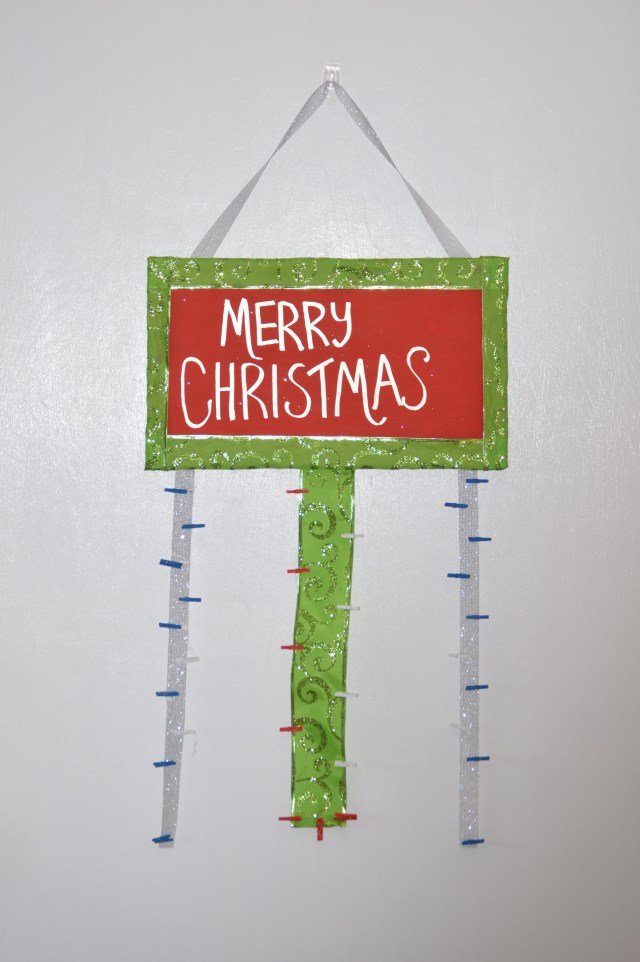
1. Cut your cardboard. I cut a rectangle for the “Merry Christmas” part of the sign that was 16″ x 10″. If you’d like a more heavy duty sign, I’d also recommend cutting cardboard for the hanging strips. In my example I cut only ribbon and sometimes it is hard to hold heavier cards.
2. Cut your ribbon to line the “Merry Christmas” part of the sign. Also, cut three pieces of ribbon for the hanging strips. These should all be the same length and can be however long you’d like. Mine are 16″.
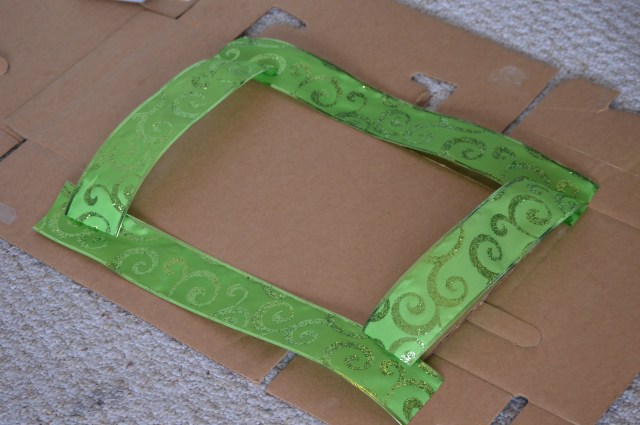
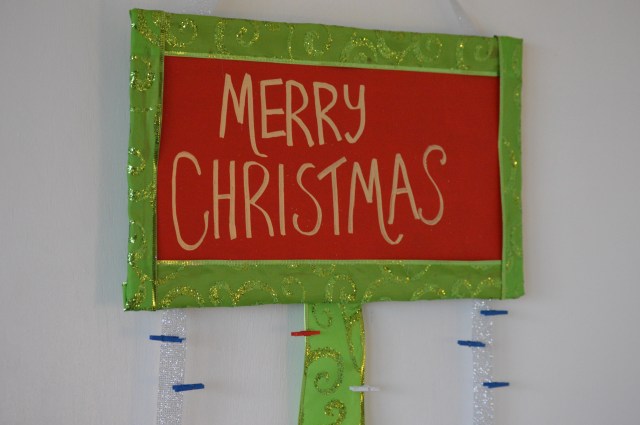
3. Paint your sign. I used red paint to go with my color scheme and contrast the green ribbon.

4. Using the hot glue gun, glue down the ribbon on the sign. I took the ribbon and folded it in half on the top of the sign so it went on both sides. Put a line of glue on both sides of the sign so the ribbon stays down. I folded the sides in on the back and glued those down. Do this for all four sides and pieces of ribbon.


5. Glue on your hanging strips to the back of the sign. Again, if you’d like a more sturdy sign, I’d recommend lining the back of the ribbon with some cardboard.

6. Paint the mini clothespins.


7. Once the mini clothespins are done drying, glue them on the ribbon using the hot glue gun. I would recommend staggering them and gluing them facing both sides.


8. Assuming your painted sign is totally dry, use the gold paint pen to write “Merry Christmas” (or the holiday greeting of your choice) on the face of the sign.

9. Lastly, glue on a piece of ribbon to use as a hanger and hang it up! Add your cards as they come!


 Styrofoam “donut circle” – 12in diameter


