DIY Ombre Pots

So as you will end up eventually noticing on this blog, I really love plants.  I can’t put my finger on what it is I like about them, but I think they bring a lot of life and decoration to a room.  My apartment has a balcony, so naturally I have put a lot of plants out there!  I was looking for an easy way to spice up the pots I have outside, since decorated pots can get fairly expensive, and I’ve been resorting to mostly terra cotta ones because they are super cheap.  However, having all terra cotta pots can get a little boring!  I’m sure that I saw this idea when cruising along Pinterest at some point, but I came up with the idea to spruce up some of my smaller terra cotta pots by giving them an ombre paint job.  It’s fairly easy and you definitely don’t have to be an artist to do it.

ombre pots 15

ombre pots

What you’ll need:
One terra cotta pot (this project will work best with small to medium pots and is best to start out with smaller and work your way up to medium)
Two 2 oz bottles (your color choice + white) of Acrylic paint (Folk Art & Americana are good brands!)
Paintbrush (smaller brush size – this is a good example)
Newspaper (so you don’t get paint on the floor/ground!)

Directions:
1. Begin with a plain terra cotta pot (this one is actually plastic, but works just the same!).  Lay down newspaper.

ombre pot 2

(^^Pot I used…sans newspaper.)

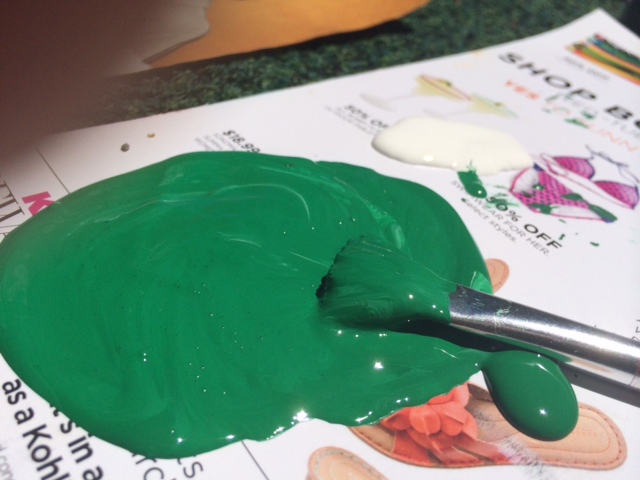
2. Squirt out a dollop of colored paint and white paint onto the newspaper.

ombre pot 5
3. Paint a ring/line the first layer of the colored paint around the bottom of the pot.

ombre pot 4

(^^This older lady is extremely impressed by my painting skills.)

4. Add a little bit of white paint to the colored paint and mix.  You might have to add more white paint or colored paint depending on how light/dark it gets.  You’re aiming for slightly less than a shade lighter.

ombrepot 5
5. Paint another ring right above (and every so slightly over the top of) the the previous ring.

ombre pot 8
6.  Repeat adding paint to make a lighter shade and painting above the previous ring until you get to the top.

7.  Let dry and your pot should have an ombre shade to it!

ombre pot 7

Chicken Pineapple Fajita Lettuce Cups

Back in my Boston days I came across these skillet sauces by Rick Bayless at the Star Market near my apartment.  I don’t know what prompted me to try it out, but I instantly fell in love.  The Star Market only carried two, the New Mexico Taco Skillet Sauce with roasted tomato + mild red chilies for chicken and the Key Lime Cilantro Taco Skillet Sauce with roasted tomatillo + green chile for shrimp.  I tried both, and the red sauce instantly became my favorite because it tastes really great with chicken (as it was meant for).  I made the Key Lime Cilantro with chicken and it was definitely good (but probably a ton better with shrimp), but the red one really became my favorite and a staple for me.  I’ve never really seen these anywhere outside of that Star Market on Beacon Street.  That is, UNTIL LAST WEEK.  ANNOUNCEMENT: SAFEWAY IN SAN FRANCISCO NOW CARRIES THESE.  I REPEAT – AS OF LAST WEEK, SAFEWAY IN SAN FRANCISCO NOW CARRIES THESE.  At least, the one in Duboce Triangle.  I know most of you don’t live around here, but I’d definitely recommend taking a look at your local grocery store and see if they have these because I really enjoy them!  They are better than the classic dry taco seasoning and pretty low calorie (25 cal & 5 cals from fat per two tablespoons).  This recipe is one I came up with in Boston using the New Mexico Taco Skillet Sauce with roasted tomato + mild red chilies.  It’s a really great summer dish and goes great with lettuce cups instead of tortillas if you want to keep it super low-cal and carb free.  Feel free to use tortillas instead, though!  Also tastes great with some guac and salsa (particularly Newman’s Own Peach Salsa – my favorite, which, unfortunately, I have yet to find in San Francisco) and even a side of chips!

333333333333333333333


Ingredients (serves two):
12 oz chicken
One red pepper
One green pepper
1/2 of a large onion (or enough to match the amount of each pepper)
1/2 a bag of New Mexico Taco Skillet Sauce with roasted tomato + mild red chilies for chicken
8 oz pineapple chunks
Cooking spray
Iceberg lettuce (or tortillas)
Guac + Salsa (optional)

Instructions:
1. Cut up peppers and onions and spray cooking spray into a large skillet.
2. Cook peppers and onions until soft, but still a little crispy (approx 10-15 minutes).  About half way through, add a little bit of skillet sauce to veggies (enough to coat them).

4444444444444444444
3. Place peppers and onions aside and spray pan with cooking spray again.  Cook chicken all the way through, adding a little more skillet sauce when chicken is almost finished cooking.

5555555555555555555

4. When chicken is finished, put veggies back in the skillet with the chicken and add the rest of the skillet sauce (1/2 the bag!).  Cook for another 5-10 minutes.

1111111111111111

5. Add in pineapples to skillet a minute or two you are ready to plate.
6. Plate and eat with lettuce cups (or tortillas) and your sides (guac, salsa, and maybe some chips!!).

2222222222222222222222


DIY Simple-Sew Dog Bandana

Major makes his Laur of All Trades debut! So the story of Major (full name: Major Tom)…he was rescued by my boyfriend about 5 years ago and is now 12 years old. He’s a little up there in age, but he’s doesn’t act it. He’s always been a lounger and his hobbies include: sleeping on the couch, sleeping on his pillow under the desk, sleeping on the bed, chilling with us on the couch…you get the drift. He is a Lhasa Apso-Poodle mix and is the sweetest dog ever. When I was back in NJ recently for my brother’s college graduation, Major went to the groomer (PetSmart – they’re really great there) and he came back with a PetSmart bandana. When I responded to the picture with, “He loves that bandana!”, Kevin responded with “Dude loves bandanas!” I’ve known Major and Kevin for a year and half and this is the first I’d heard of any Major-bandana lovin. Naturally, I was on a mission then to make this cutie his own bandanas. I went to Fabric Outlet in the Mission as soon as I was back in San Francisco and got four different fabrics: island theme (because it’s summer), bad dog skulls (it’s funny because he is the total opposite), western themed trains (because…ADORABLE), and Halloween (the next upcoming holiday!).  I also got fabric for another project, some thread, a hot glue gun + glue, and mod podge (again, for other projects).  In short, Fabric Outlet is awesome.

2014-07-04_1404516428

I did meet some opposition after I took off the PetSmart scarf and used it to figure out how large I should make this one though…
maj scarf2

He got over it and has been enjoying his new one since!

So without further ado, here’s how you can make your own simple-sew dog scarf!  No sewing machine needed and these particular measurements fit a medium size dog (Major is 25 lbs).  If your dog is any smaller, this will definitely be too big, so I’d recommend getting more fabric than you might need for the first one to cut out a few test sizes (you can use the same proportions, though!).

What you’ll need:
Fabric of your choice (I found a cotton blend that is very similar to a typical bandana)
Sewing needle
Placeholder needles
Thread (color is whatever you think might match the fabric the best)
Scissors
Ruler

Instructions:
1. Trace the measurements you will need (I created a template scarf which I’ll keep moving forward to have an easy trace).

hawaii 1

The top should measure 20″ across, each side 15″, and from the middle of the top to the tip, 10″. (Note: Please keep in mind that this triangle is not to scale. I’m only illustrating what section needs to be what length.)
udt1111

 2. Cut out the triangle.

3. Fold down the sides so that the frayed part is rolled underneath the fabric, so the seam is clean.  “Seal” with a needle.  The “fold over” should measure about 1/4″.  If your dog is smaller and you’re hands aren’t as nimble, you can definitely make the “fold over” larger.

hawaii3

4.  Sew it and you’re done!

hawaii4

Major loves it!hawaii2

BABY. SLOTHS.

Got your attention?  Taking a break from my regularly scheduled programming of food, plants, and DIY to bring you my new [second] favorite animal BABY SLOTHS.   (Bunnies will always be my numero uno.)

tumblr_n5ttenkz371tumrzwo1_500 tumblr_n46bweShiG1s8fjzjo3_500

 ^ Basically how I feel on Fridays or anytime I eat something delicious. ^


Soooo I’m a little obsessed and you NEED NEED NEED to watch this baby sloth video.  Seriously.  Having a down day?  Immediate cheer up.  In a happy mood?  Bring it to ecstasy.  Just want to see something cute?  HERE YA GO.  It will melt your heart and I am convinced world peace will occur if it is viewed across the globe.  So spread the word!  BABY SLOTHS SQUEAKING.

And if that’s not enough…here’s some baby sloths getting a bath and then eating hibiscus flowers because it’s like chocolate for sloths. #omgicanteven.  BABY SLOTHS GETTING A BATH.

If it’s STILL not enough (let’s be real…it’s not) I’d recommend checking out http://thatslothblog.tumblr.com/ and the 30 cutest pictures of baby sloths on the internet.