Chicken Pineapple Fajita Lettuce Cups

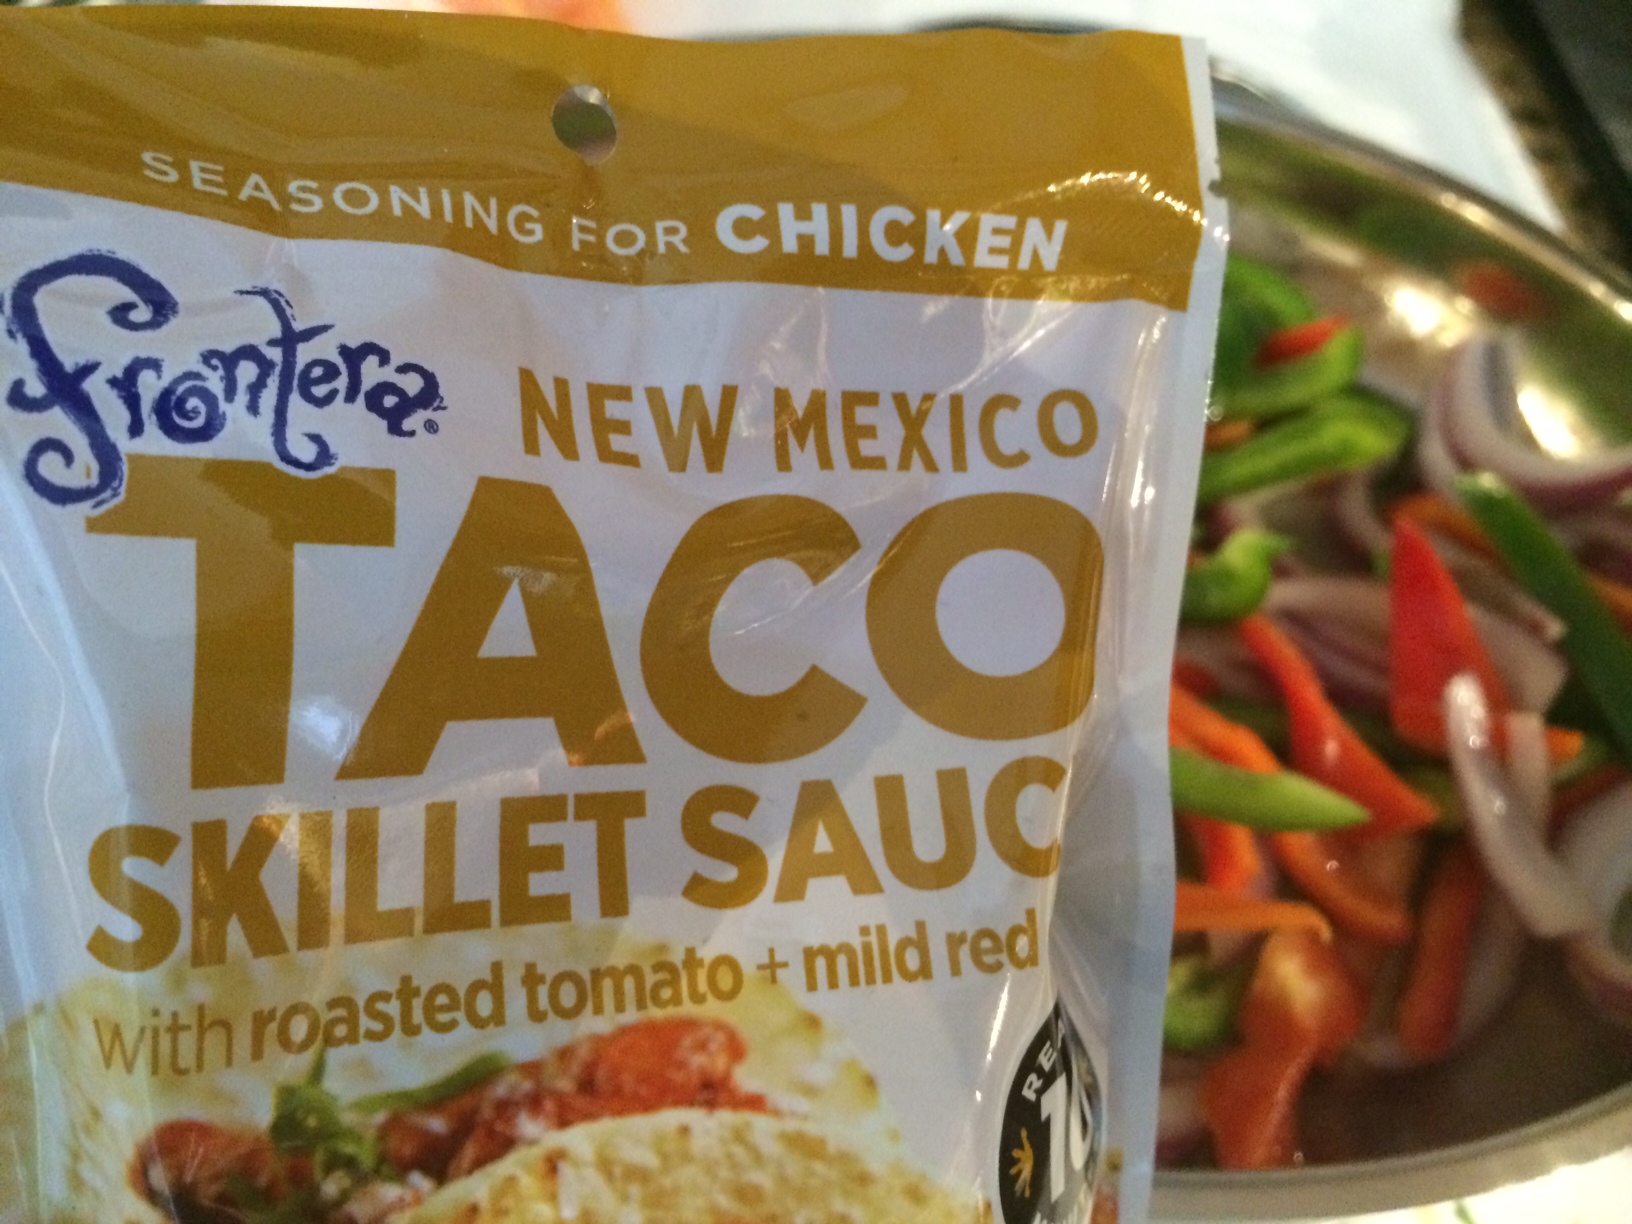
Back in my Boston days I came across these skillet sauces by Rick Bayless at the Star Market near my apartment.  I don’t know what prompted me to try it out, but I instantly fell in love.  The Star Market only carried two, the New Mexico Taco Skillet Sauce with roasted tomato + mild red chilies for chicken and the Key Lime Cilantro Taco Skillet Sauce with roasted tomatillo + green chile for shrimp.  I tried both, and the red sauce instantly became my favorite because it tastes really great with chicken (as it was meant for).  I made the Key Lime Cilantro with chicken and it was definitely good (but probably a ton better with shrimp), but the red one really became my favorite and a staple for me.  I’ve never really seen these anywhere outside of that Star Market on Beacon Street.  That is, UNTIL LAST WEEK.  ANNOUNCEMENT: SAFEWAY IN SAN FRANCISCO NOW CARRIES THESE.  I REPEAT – AS OF LAST WEEK, SAFEWAY IN SAN FRANCISCO NOW CARRIES THESE.  At least, the one in Duboce Triangle.  I know most of you don’t live around here, but I’d definitely recommend taking a look at your local grocery store and see if they have these because I really enjoy them!  They are better than the classic dry taco seasoning and pretty low calorie (25 cal & 5 cals from fat per two tablespoons).  This recipe is one I came up with in Boston using the New Mexico Taco Skillet Sauce with roasted tomato + mild red chilies.  It’s a really great summer dish and goes great with lettuce cups instead of tortillas if you want to keep it super low-cal and carb free.  Feel free to use tortillas instead, though!  Also tastes great with some guac and salsa (particularly Newman’s Own Peach Salsa – my favorite, which, unfortunately, I have yet to find in San Francisco) and even a side of chips!

333333333333333333333


Ingredients (serves two):
12 oz chicken
One red pepper
One green pepper
1/2 of a large onion (or enough to match the amount of each pepper)
1/2 a bag of New Mexico Taco Skillet Sauce with roasted tomato + mild red chilies for chicken
8 oz pineapple chunks
Cooking spray
Iceberg lettuce (or tortillas)
Guac + Salsa (optional)

Instructions:
1. Cut up peppers and onions and spray cooking spray into a large skillet.
2. Cook peppers and onions until soft, but still a little crispy (approx 10-15 minutes).  About half way through, add a little bit of skillet sauce to veggies (enough to coat them).

4444444444444444444
3. Place peppers and onions aside and spray pan with cooking spray again.  Cook chicken all the way through, adding a little more skillet sauce when chicken is almost finished cooking.

5555555555555555555

4. When chicken is finished, put veggies back in the skillet with the chicken and add the rest of the skillet sauce (1/2 the bag!).  Cook for another 5-10 minutes.

1111111111111111

5. Add in pineapples to skillet a minute or two you are ready to plate.
6. Plate and eat with lettuce cups (or tortillas) and your sides (guac, salsa, and maybe some chips!!).

2222222222222222222222


DIY Simple-Sew Dog Bandana

Major makes his Laur of All Trades debut! So the story of Major (full name: Major Tom)…he was rescued by my boyfriend about 5 years ago and is now 12 years old. He’s a little up there in age, but he’s doesn’t act it. He’s always been a lounger and his hobbies include: sleeping on the couch, sleeping on his pillow under the desk, sleeping on the bed, chilling with us on the couch…you get the drift. He is a Lhasa Apso-Poodle mix and is the sweetest dog ever. When I was back in NJ recently for my brother’s college graduation, Major went to the groomer (PetSmart – they’re really great there) and he came back with a PetSmart bandana. When I responded to the picture with, “He loves that bandana!”, Kevin responded with “Dude loves bandanas!” I’ve known Major and Kevin for a year and half and this is the first I’d heard of any Major-bandana lovin. Naturally, I was on a mission then to make this cutie his own bandanas. I went to Fabric Outlet in the Mission as soon as I was back in San Francisco and got four different fabrics: island theme (because it’s summer), bad dog skulls (it’s funny because he is the total opposite), western themed trains (because…ADORABLE), and Halloween (the next upcoming holiday!).  I also got fabric for another project, some thread, a hot glue gun + glue, and mod podge (again, for other projects).  In short, Fabric Outlet is awesome.

2014-07-04_1404516428

I did meet some opposition after I took off the PetSmart scarf and used it to figure out how large I should make this one though…
maj scarf2

He got over it and has been enjoying his new one since!

So without further ado, here’s how you can make your own simple-sew dog scarf!  No sewing machine needed and these particular measurements fit a medium size dog (Major is 25 lbs).  If your dog is any smaller, this will definitely be too big, so I’d recommend getting more fabric than you might need for the first one to cut out a few test sizes (you can use the same proportions, though!).

What you’ll need:
Fabric of your choice (I found a cotton blend that is very similar to a typical bandana)
Sewing needle
Placeholder needles
Thread (color is whatever you think might match the fabric the best)
Scissors
Ruler

Instructions:
1. Trace the measurements you will need (I created a template scarf which I’ll keep moving forward to have an easy trace).

hawaii 1

The top should measure 20″ across, each side 15″, and from the middle of the top to the tip, 10″. (Note: Please keep in mind that this triangle is not to scale. I’m only illustrating what section needs to be what length.)
udt1111

 2. Cut out the triangle.

3. Fold down the sides so that the frayed part is rolled underneath the fabric, so the seam is clean.  “Seal” with a needle.  The “fold over” should measure about 1/4″.  If your dog is smaller and you’re hands aren’t as nimble, you can definitely make the “fold over” larger.

hawaii3

4.  Sew it and you’re done!

hawaii4

Major loves it!hawaii2

Bruschetta + Grilled Chicken

A healthy protein filled bruschetta dinner!  This is a really delicious bruschetta recipe that tastes just like what you’d get in a nice Italian restaurant.  I really like bread, so I doubled the bruschetta recipe below to make a bruschetta appetizer with bread.  Outside of the bruschetta, this dish is super simple, being comprised of basically a grilled/broiled chicken breast and a side arugula salad (with more bruschetta on top, of course!).  If you want to make an appetizer plus the chicken dinner for two, I would recommend doubling the bruschetta recipe, but if you want just the chicken + bruschetta + some for the salad for two, or just bruschetta, the recipe below is MORE than enough.  Plus, it is very healthy, especially if you use part skim mozzarella! Thanks to Skinny Taste for the recipe!
bruchick4

Ingredients:

3 medium vine ripe tomatoes
2 cloves of garlic, pressed
1/4 cup chopped red onion
2 tbsp fresh basil leaves, chopped
1 tbsp extra virgin olive oil
1 tbsp balsamic vinegar
salt and pepper to taste
3 oz part skim mozzarella, diced
2 chicken breasts
4 cups arugula
bread (optional)

Instructions:

1. Combine onion, olive oil, balsamic vinegar, salt and pepper.  Set aside.
2. Chop tomatoes and place into a large bowl.
3. Combine with garlic, basil, and onion-balsamic mixture from step 1.  Set aside to sit at least 10 minutes or as long as overnight.
4.  Add in the mozzarella cheese when ready to serve.  Your bruschetta is complete!
5. Season the chicken with salt and pepper.  Grill or broil (or cook however you please, really!) the chicken and top with the bruschetta.
6. Add arugula and top with some bruschetta. Serve!
 

bruchick3bruchick2bruchick

Spaghetti Squash Italian Casserole

This is the recipe that transformed my boyfriend and I into spaghetti squash fanatics (or “sketti squash” as we affectionately refer to it as now).  I knew of spaghetti squash because a friend of mine raved about it in college, but I don’t think I ever tasted it.  We try to eat really healthy, and my boyfriend came across this recipe earlier in the year.  It’s still our favorite spaghetti squash recipe, and the best parts about it are that it’s super easy to make, very healthy, and heats up very well (helloooo leftovers)!  Thanks to (Healthy) Vittles and Bits for the original recipe (I have modified it slightly to reflect how I make it)!

unnamed

Ingredients:

1 lb ground turkey
3 pressed garlic cloves
2 cups tomato sauce
1 tsp dried oregano/parsley mix (3/4 oregano, 1/4 parsley)
3/4 (6oz) bag of shredded, reduced fat mozzarella cheese
1 large spaghetti squash
1/2 cup Feta cheese

Directions:

1. Preheat oven to 375 degrees.
2. Cut the spaghetti squash in half lengthwise. Scoop out the seeds and discard. Place each half face down on a large microwaveable plate and microwave for 10 minutes on high.
3.  While the squash is cooking in the microwave, brown the ground turkey over medium heat. Add in the garlic, tomato sauce, oregano/parsley mix seasoning.  Mix together.  Stir in 1/2 of shredded mozzarella.
4. When the squash is finished cooking, let cool for a few minutes.  Then scrape out the insides of the squash halves using a fork into a 9×13 pan (if it is not a non-stick pan, spray with some olive oil cooking spray).  The spaghetti squash should be the first layer on the bottom of the pan.
5. Spoon the ground turkey mixture on top of the spaghetti squash.
6. Sprinkle the feta cheese and the rest of the mozzarella cheese on top and bake uncovered for about 20-25 minutes.
7.  After 20-25 minutes, broil for 3-5 minutes (500 degrees) until the cheese is nice and browned on top.
8. Serve!

unnamed (1)


M&M Blonde Brownies (or Giant Cookie)

I didn’t “get” baking for a long time.  Truth be told was that I really didn’t have a REASON to bake.  In my opinion, baking costs “extra” money (I see it as a novelty). Baking is, well, fatty.  And it’s really hard to bake something for just myself and not eat all 5,000 calories of it in a matter of days.

Well, the tides have turned though!  I went to a brunch potluck meetup in a park a few weeks ago and decided that instead of buying something, I was going to bake.  I’ve baked successfully in the past (I made a pretty awesome lemon poppy seed cake with glaze for a friend’s birthday last year…AND enjoyed doing so), but never really saw the value until I made something for the brunch potluck.  This blondie/cookie creation wasn’t what I made, but I did catch the baking bug and made this when my boyfriend went on a business trip and I was left to my own deVICEs (ha. ha.).

This was pre-blog, so I don’t have too many pictures, but this recipe is BANGIN! It’s really simple and if you put it in a large enough pan, it turns out more like a thick cookie.  This also happens if you cook it so it’s a little moist and not completely cooked through.  It’s so good I made it again last week…and forgot to take pictures.  Kudos to Inside BruCrew Life for this M&M Blonde Brownies recipe.

M&M Blonde Brownie

Ingredients:
1/2 cup butter, softened
2 cups brown sugar
2 eggs
1 teaspoon vanilla
1 teaspoon salt
2 teaspoons baking powder
2 cups flour

1 1/2 cups M&M candies (I used dark chocolate)

Directions (modified because…who has a mixer):
1. Stir the butter and brown sugar together until creamy. Add the eggs and vanilla and stir more. Mix together the salt, baking powder, and flour. Slowly mix into the butter mixture. Stir in 1 cup of the M&M’s.
2. Spread the batter in a greased baking dish.
3. Bake at 350 degrees for 23-25 minutes. Let cool or start going crazy while it’s still warm!