My BH&G subscription!


My BH&G subscription!
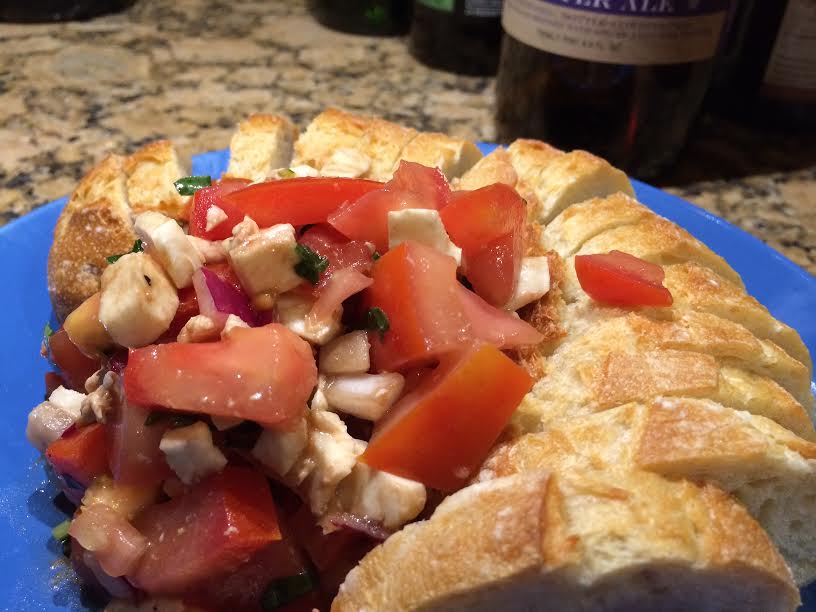
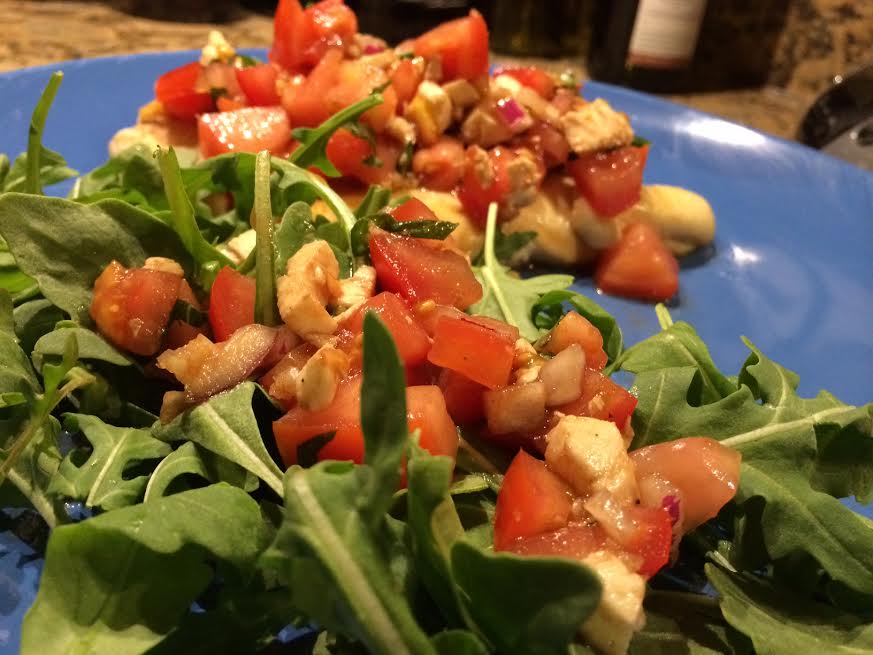
A healthy protein filled bruschetta dinner! This is a really delicious bruschetta recipe that tastes just like what you’d get in a nice Italian restaurant. I really like bread, so I doubled the bruschetta recipe below to make a bruschetta appetizer with bread. Outside of the bruschetta, this dish is super simple, being comprised of basically a grilled/broiled chicken breast and a side arugula salad (with more bruschetta on top, of course!). If you want to make an appetizer plus the chicken dinner for two, I would recommend doubling the bruschetta recipe, but if you want just the chicken + bruschetta + some for the salad for two, or just bruschetta, the recipe below is MORE than enough. Plus, it is very healthy, especially if you use part skim mozzarella! Thanks to Skinny Taste for the recipe!

Ingredients:
3 medium vine ripe tomatoes
2 cloves of garlic, pressed
1/4 cup chopped red onion
2 tbsp fresh basil leaves, chopped
1 tbsp extra virgin olive oil
1 tbsp balsamic vinegar
salt and pepper to taste
3 oz part skim mozzarella, diced
2 chicken breasts
4 cups arugula
bread (optional)
Instructions:
1. Combine onion, olive oil, balsamic vinegar, salt and pepper. Set aside.
2. Chop tomatoes and place into a large bowl.
3. Combine with garlic, basil, and onion-balsamic mixture from step 1. Set aside to sit at least 10 minutes or as long as overnight.
4. Add in the mozzarella cheese when ready to serve. Your bruschetta is complete!
5. Season the chicken with salt and pepper. Grill or broil (or cook however you please, really!) the chicken and top with the bruschetta.
6. Add arugula and top with some bruschetta. Serve!

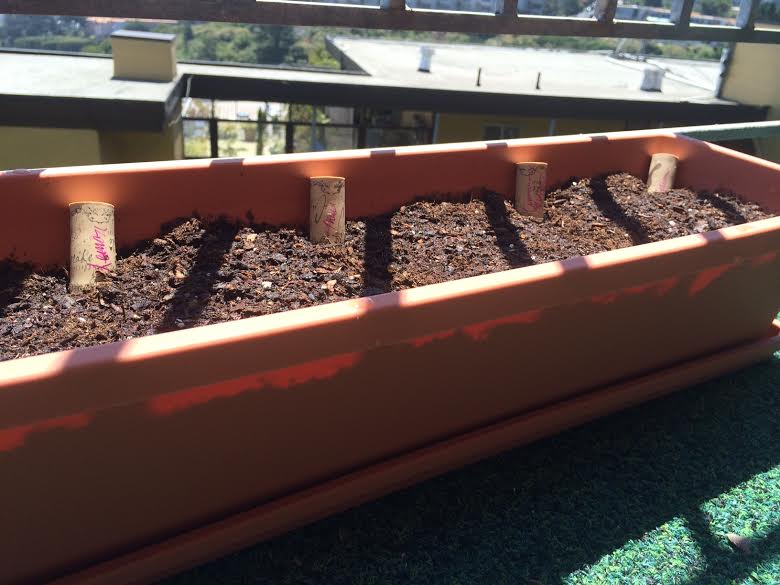
I’ve always been a big fan of plants and gardening, but I’ve never actually grown my own food. I decided to take the plunge and start out with some basil, so I bought a variety pack of seeds at Home Depot. They were only about $5, so relatively cheap if things don’t work out. Basil is amazing took cook with and the pack came with Cinnamon, Italian, Lemon, and Thai. I can’t decide which I’m most excited about; I use Italian basil on a regular basis, Thai basil will enable me to enhance some amazing Thai dishes, and I’ve never used the other two, so I’m really excited to try them out!
Now, with four different types of basil that will probably all look the same, I was going to need a way to differentiate which is which. I had a bunch of old corks lying around (I’ve been collecting them for show and reasons like this), and with some pinterest inspiration, my DIY Herb/Garden Markers were born.

All you need:
Corks (how many depends on how many markers you need)
Permanent Pen/Marker
Your seeds/plants/and all the fixins for that
How to do it:
The process is incredibly simple (as I’m sure you’ve figured out)…all you need to do is plant your seeds (I don’t have an actual garden, so they are in a rectangular pot), write the name of the specific plant or type of plant on the cork, and put it in the appropriate spot! I split my seeds up into four square sections in this pot, so I put the marker where each one ends. Voila! You have your markers. You can also add sticks to them, too if you want them to pop up more. I would recommend using kebab skewers cut in half.

This is the recipe that transformed my boyfriend and I into spaghetti squash fanatics (or “sketti squash” as we affectionately refer to it as now). I knew of spaghetti squash because a friend of mine raved about it in college, but I don’t think I ever tasted it. We try to eat really healthy, and my boyfriend came across this recipe earlier in the year. It’s still our favorite spaghetti squash recipe, and the best parts about it are that it’s super easy to make, very healthy, and heats up very well (helloooo leftovers)! Thanks to (Healthy) Vittles and Bits for the original recipe (I have modified it slightly to reflect how I make it)!

Ingredients:
1 lb ground turkey
3 pressed garlic cloves
2 cups tomato sauce
1 tsp dried oregano/parsley mix (3/4 oregano, 1/4 parsley)
3/4 (6oz) bag of shredded, reduced fat mozzarella cheese
1 large spaghetti squash
1/2 cup Feta cheese
Directions:
1. Preheat oven to 375 degrees.
2. Cut the spaghetti squash in half lengthwise. Scoop out the seeds and discard. Place each half face down on a large microwaveable plate and microwave for 10 minutes on high.
3. While the squash is cooking in the microwave, brown the ground turkey over medium heat. Add in the garlic, tomato sauce, oregano/parsley mix seasoning. Mix together. Stir in 1/2 of shredded mozzarella.
4. When the squash is finished cooking, let cool for a few minutes. Then scrape out the insides of the squash halves using a fork into a 9×13 pan (if it is not a non-stick pan, spray with some olive oil cooking spray). The spaghetti squash should be the first layer on the bottom of the pan.
5. Spoon the ground turkey mixture on top of the spaghetti squash.
6. Sprinkle the feta cheese and the rest of the mozzarella cheese on top and bake uncovered for about 20-25 minutes.
7. After 20-25 minutes, broil for 3-5 minutes (500 degrees) until the cheese is nice and browned on top.
8. Serve!

I’m not sure why I decided I wanted to learn how to crochet, but here we are. I like making things, so it seemed like a fun thing to learn. I’d really like to make a hat/beanie and even maybe a sweater or blanket at some point. I chose crocheting over knitting because from online research, it seems more versatile than knitting. There are tons of arguments for both sides, though. I see it as similar to the snowboarding vs. skiing debate; all depends on the person which is easier, what they eventually want to make, design preferences, etc. But anyway, here’s my first attempt at knitting…it looks more like a deformed cat toy, but, hey, it’s a start. My main issue is that I’m making the loops too tight, so I need to work on that.

I’m using this book I got off Amazon, which is a crochet book for beginners. It comes with all the basic tools you need as well as instructions on how to get started, different stitches, and a bunch of patterns for beginners. Only thing I had to go get was yarn and I was ready to start! I read that light yarn is best to work with when you’re first starting because it’s easier to see the loops, so I bought light blue and grey yarn. They’re just standard size yarn and match nicely and hopefully soon I’ll be able to make something useful!

I didn’t “get” baking for a long time. Truth be told was that I really didn’t have a REASON to bake. In my opinion, baking costs “extra” money (I see it as a novelty). Baking is, well, fatty. And it’s really hard to bake something for just myself and not eat all 5,000 calories of it in a matter of days.
Well, the tides have turned though! I went to a brunch potluck meetup in a park a few weeks ago and decided that instead of buying something, I was going to bake. I’ve baked successfully in the past (I made a pretty awesome lemon poppy seed cake with glaze for a friend’s birthday last year…AND enjoyed doing so), but never really saw the value until I made something for the brunch potluck. This blondie/cookie creation wasn’t what I made, but I did catch the baking bug and made this when my boyfriend went on a business trip and I was left to my own deVICEs (ha. ha.).
This was pre-blog, so I don’t have too many pictures, but this recipe is BANGIN! It’s really simple and if you put it in a large enough pan, it turns out more like a thick cookie. This also happens if you cook it so it’s a little moist and not completely cooked through. It’s so good I made it again last week…and forgot to take pictures. Kudos to Inside BruCrew Life for this M&M Blonde Brownies recipe.

1 1/2 cups M&M candies (I used dark chocolate)
My friends will laugh, but I just bought a subscription to Better Homes & Gardens. I figured this would be the perfect opportunity to write my first blog post. Hi, my name is Lauren, or Laur for short, and I’m just going to say it…I like being an adult. Well, if you consider 26 an adult…I do. I was surprised to come to this realization because I really enjoyed college and thought that “real life” would be OK, but thought I would never be as content as I was in college. However, three years after graduating, I am finding that “real life” aka “adulthood” isn’t all that bad. In fact, it’s great. Call me boring, but I enjoy having a steady job that pays the bills, I like having my own apartment, I like being in a committed relationship, and I like blanket baskets. YES I SAID IT. I LIKE BLANKET BASKETS (College Lauren is asking: WHO ARE YOU??). Other things I like? My dog, crafts/DIY, plants (ehrmeghad I love plants), fashion, exercise (mostly running, but I can’t do that anymore … because I’m an old lady adult…more to come on that later), travel, and cooking. That’s a lot of stuff, which is why I’m a “Laur” {Jack} of all trades, master of some. I’m pretty good at a lot of things (hence the “master of some”), but I have so many interests it’s hard to consider myself like an Emeril Lagasi in the kitchen or Michelangelo in the arts (…& crafts…you get my point). [Shout out to Ali for the idea!] So I guess now’s where I get to “the point of this blog.” I don’t really have a point. I’ll probably post a lot DIY things, plants, dogs, some fashion, workouts, etc., and talk about how much I enjoy being an adult. I recently moved to San Francisco with my boyfriend with not a friend in over 400 miles, so I have a lot of spare time that I need to occupy (and do something other than binge watch Dexter).
Oh, so back to the Better Homes & Gardens subscription. I have loved Better Homes & Garden since college (College Lauren is actually saying “FINALLY” to this subscription) and saw a post on Facebook about Best Tropical Flowers for your Patio. Naturally, I clicked because I HAVE A BALCONY AND LOVE PLANTS. Then they got me in with a $5.99 subscription offer for one year. How could I say no? Can’t.
