
My favorite season, Fall, is here and Halloween is fast approaching. I’m not afraid to admit that I essentially love everything “basic” about this season. Although I do find pumpkin spice lattes a bit too sweet, I love decorating, going to pumpkin patches, and the impending chilly weather (but in SF it’s more like the weather finally matches the season). In the past I had put some maize corn on our door as a decoration, but last year I saw some really cute fall wreaths on Pinterest and decided to make my own. Here’s how you can make this really cute wreath yourself!

Materials:
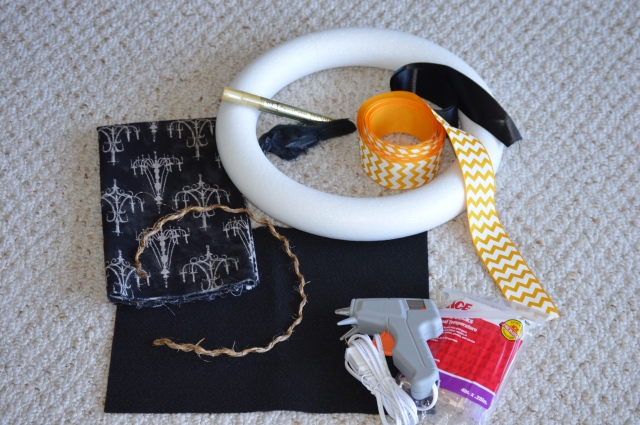 Styrofoam “donut circle” – 12in diameter
1 yard black ribbon
2 yards chevron orange and white ribbon
Toy crow
Gold felt pen
1 ft twine
Hot glue gun & extra glue
Black felt square
Small piece of fabric of your pattern choice – I purchased 1 yard at the store because I knew I’d use it again, but really you only need enough to make your crow a large enough hat.
Instructions:
1. Start with the chevron orange ribbon and styrofoam. Using the hot glue gun, glue the beginning end to what you’ll deem the back of the wreath. Then, slowly wrap the ribbon around the styrofoam. Every two wrap-arounds, use the hot glue gun to glue down the ribbon. In the image below, I would put a small line of glue where the ribbon is hitting the styrofoam. Do this until you have again reached your starting point (it’s OK if it overlaps a little), and make sure the end part of the ribbon is glued on the back.

2. Take the twine and measure the length you’ll have the “boo” sign reach one side of the styrofoam to the other and cut. You’ll want a bit of slack so it looks like the sign is hanging. Do NOT glue on styrofoam yet.

3. Cut out three small triangles from the black felt and write out “BOO” with each letter on a separate triangle.

4. Using the hot glue gun, glue each triangle onto the twine. Once the glue has dried, glue the twine onto styrofoam at the points where you previously measured.

5. Time to make a cute hat for your crow! Take a piece of fabric and roll it into a cylinder hat shape that is an appropriate size for the crow. Use the hot glue gun to glue it together. If you’d like, you can take a piece of twine and make a bottom liner for the hat and glue on with the hot glue gun. Once you’ve created your hat, glue onto the crow. I found the easiest way to do this was to put some glue on the crow’s head approximately how wide the hat is and press down lightly.

6. Hot glue gun your crow onto the wreath wherever you’d like him to sit. I also took some twine and feathered the edges to make it look as though he was sitting on a broom. Hot glue gun that near his feet!

7. Lastly, figure out where you’d like to hang the wreath. Take your black ribbon and loop in around the top of your wreath and tie the top into a nice bow. You can shorten your ribbon if you’d like the wreath to hang higher. 
8. Hang your wreath and enjoy! Happy Halloween!

